Adding Patient
info
A Patient, or Proband, is a person from whom samples were taken for analysis.
In case you want to upload samples for a patient who is not yet in
the system, click on  on
the "All Patients" or "Samples" page. You will see the add patient window:
on
the "All Patients" or "Samples" page. You will see the add patient window:
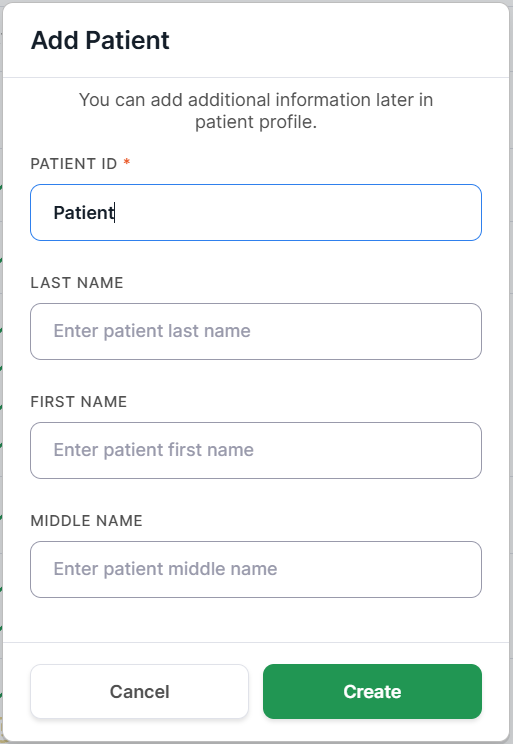
Only the Patient ID field is required. You can fill out the details later on this patient's personal
page.
Click on  to proceed.
You will see the patient page.
to proceed.
You will see the patient page.
Patient Page#
The patient page without uploaded samples looks like this:
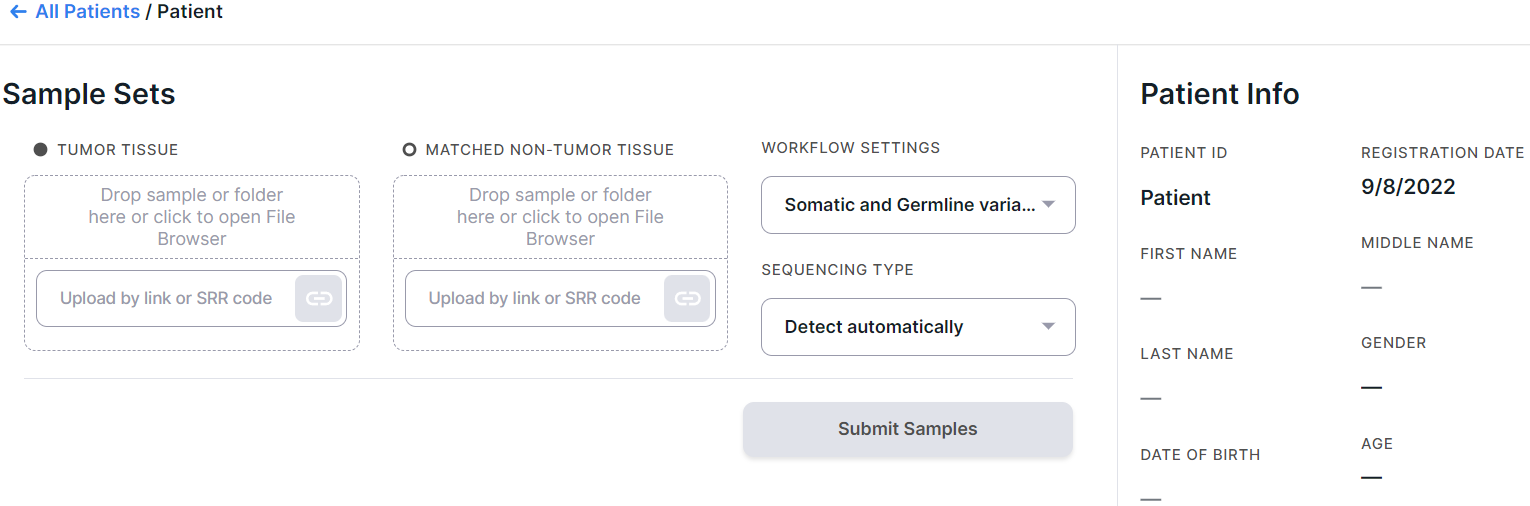
Uploading sample sets is described in the relevant sections of the documentation:
- Uploading a Pair of Tumor/Normal Samples - to analyze the results of sequencing of tumor and normal (control) tissues of the same patient;
- Uploading Tumor Samples - to analyze the results of sequencing of the patient's tumor tissue (without control, i.e. sample of matched non-tumor tissue);
- Uploading Normal Samples - to analyze the results of sequencing of normal (non-tumor) human tissue.
The patient page with uploaded samples looks like this:
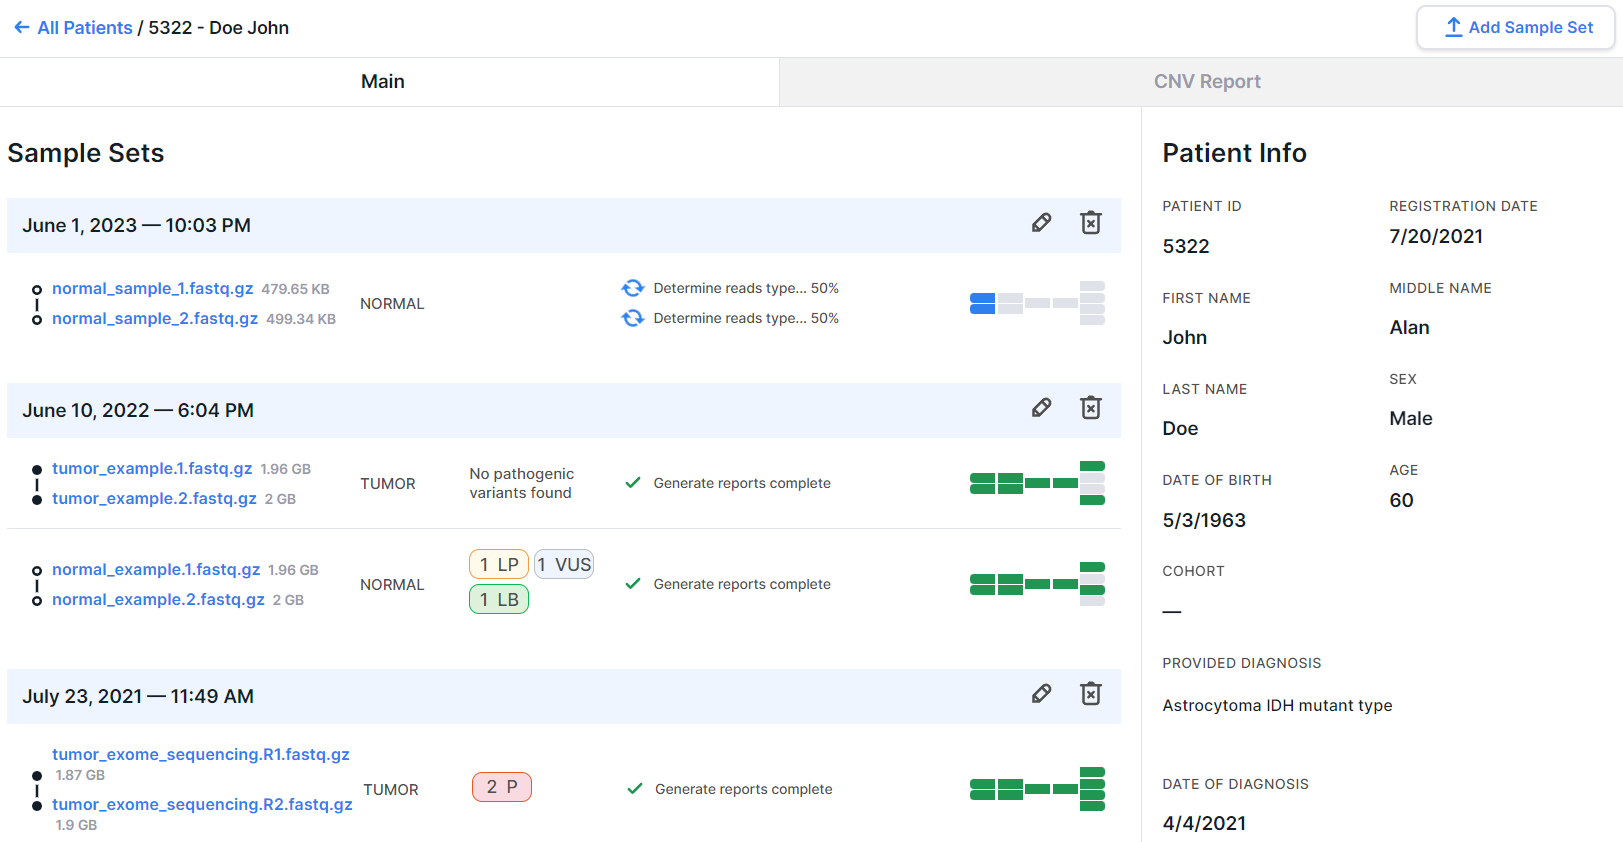
There can be two tabs on the page: "Main" and "CNV Report" if "CNV Report" has been generated (see conditions here), or there are no tabs on the page if "CNV Report" has not been generated.
info
On "Profile Settings" page, you can configure which tab you will see first when you open the patient page: "Main" or "CNV Report".
There are two main entities on the patient page: Sample Set and Sample.
1. Sample Set#
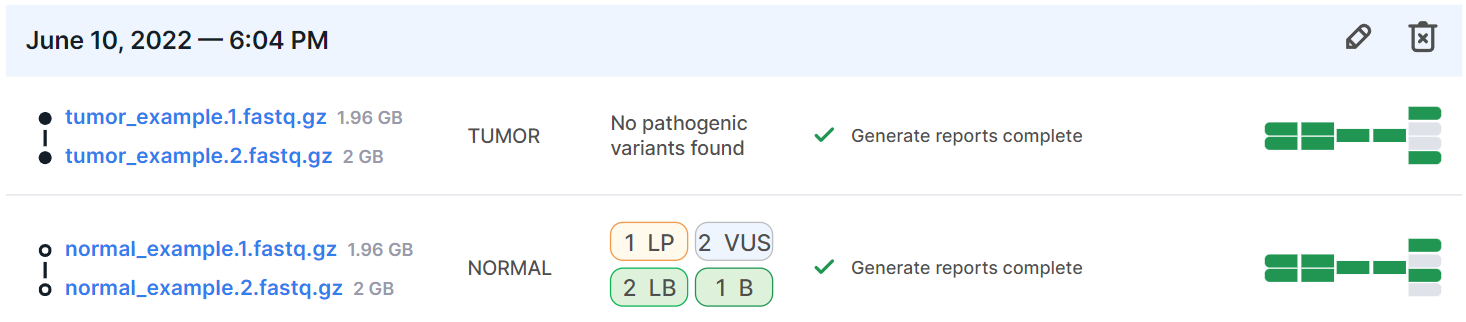
A sample set consists of one or more samples of the same patient. The date and time the set was added are indicated in the blue bar at the top of the set. In the following example, the sample set consists of a tumor/control sample pair:
Edit Sample Set#
To edit a sample set, click on the button ![]() located on the blue bar at the top of the set. A sample set editing window will open:
located on the blue bar at the top of the set. A sample set editing window will open:
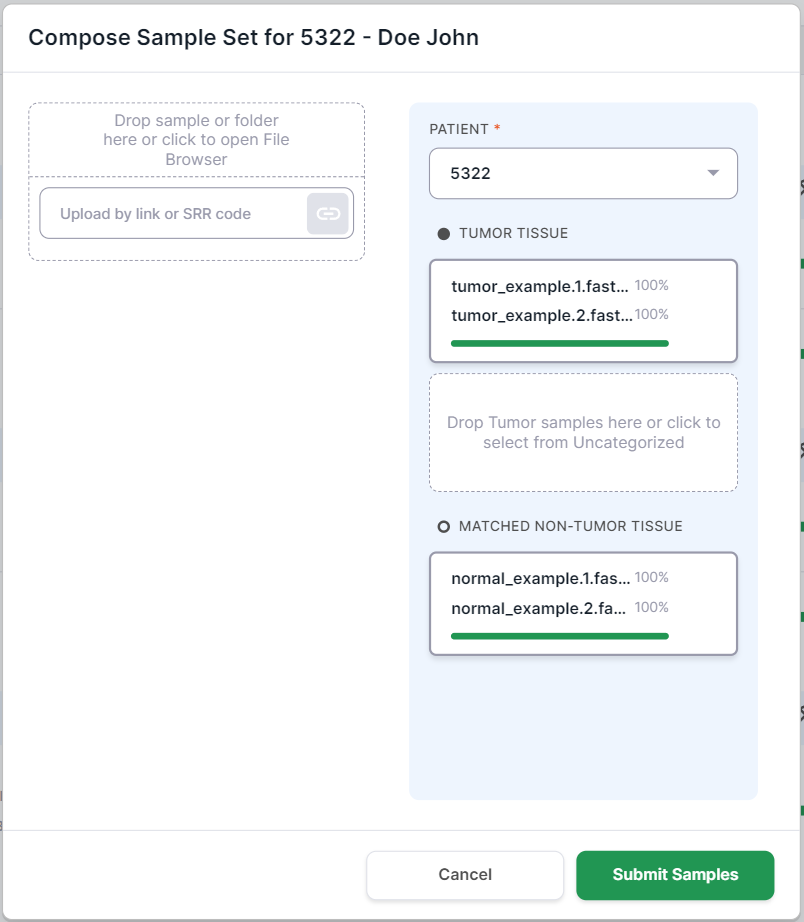
The window appearance will depend on the analysis mode that was selected when creating a sample set (if "Somatic and germline variant analysis" was selected, then there will be a tumor sample placeholder, and if "Germline variant analysis" was selected, then there will not be one).
In edit mode, you can:
- remove one of the samples from the set (or change it to another). To do this, hover over the sample
and click on
 . The sample will be moved to the "Uncategorized Samples" section, located on the left side of the editing window (which is also a Compose Sample Set window). From there, the sample can be deleted by hovering over it and clicking on
  . If the sample will be left
in the "Uncategorized Samples" section, it will be available for reusing in another sample set without
having to repeat the Upload, Identify and Verify stages. Please note that if a sample is removed from the set,
the rest of the sample analysis progress will be lost.
. If the sample will be left
in the "Uncategorized Samples" section, it will be available for reusing in another sample set without
having to repeat the Upload, Identify and Verify stages. Please note that if a sample is removed from the set,
the rest of the sample analysis progress will be lost. - add another sample to the set (in addition to the ones already added or instead of one of them). To do this, upload the sample (see the documentation sections about uploading samples) and add it to the sample set by dragging it to the tumor tissue or non-tumor tissue placeholder, or by clicking on the placeholder and selecting the uploaded sample.
- change the sample type: for example, from tumor to non-tumor or vice versa. To do this, drag the
sample to a differently-typed placeholder not occupied by another sample. If the placeholder is occupied,
then first remove the sample from it by clicking on ,
and only then drag the sample to the placeholder. In this way, you can swap the samples in types if necessary.
- change a patient for a set: click on the patient selection window and select a patient from the already
added patients or create a new one by
clicking on
 and filling out the form
as described above.
and filling out the form
as described above.
To save the changes, click on  , and to cancel all the changes made, click on
  or outside the editing window. If you change the sample set composition, the analysis of the set
will restart from the necessary stages.
or outside the editing window. If you change the sample set composition, the analysis of the set
will restart from the necessary stages.
Delete Sample Set#
To delete a sample set, click on the button ![]() located on the blue bar at the top of the set. The sample set deletion confirmation window will open:
located on the blue bar at the top of the set. The sample set deletion confirmation window will open:
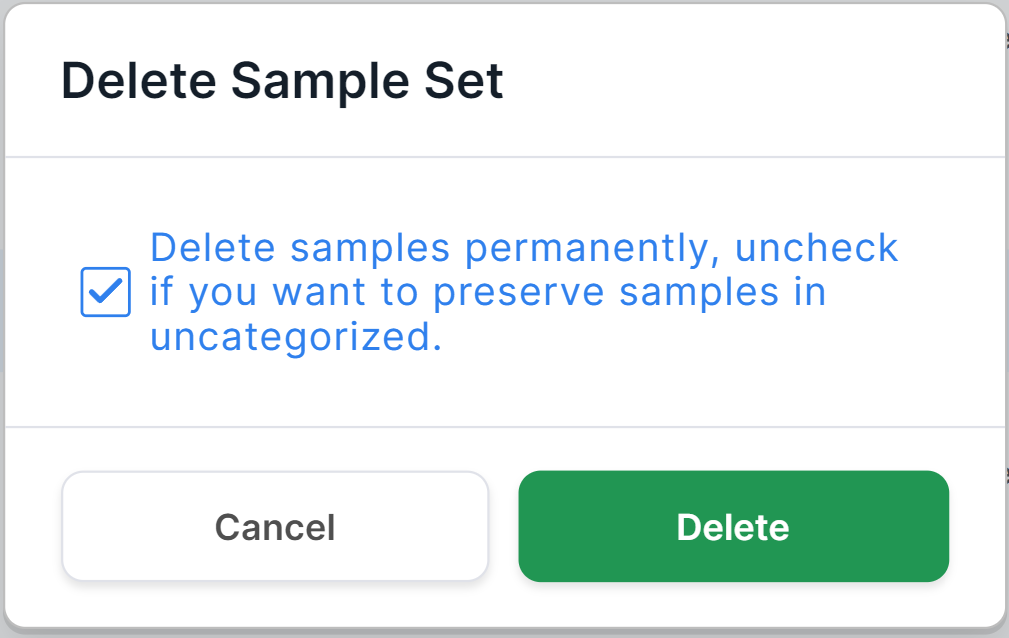
To permanently delete the sample set from the system,
click on  . To delete the sample set, but leave the samples in the "Uncategorized Samples" section (so that they will be available for reusing in another sample set without having to repeat the Upload, Identify and Verify stages), uncheck
 ![]() and then click on . To cancel deleting a set, click on
or outside the confirmation window.
and then click on . To cancel deleting a set, click on
or outside the confirmation window.
2. Sample#
note
A sample is a single sample from a sample set.
To open the sample page, click on its row:
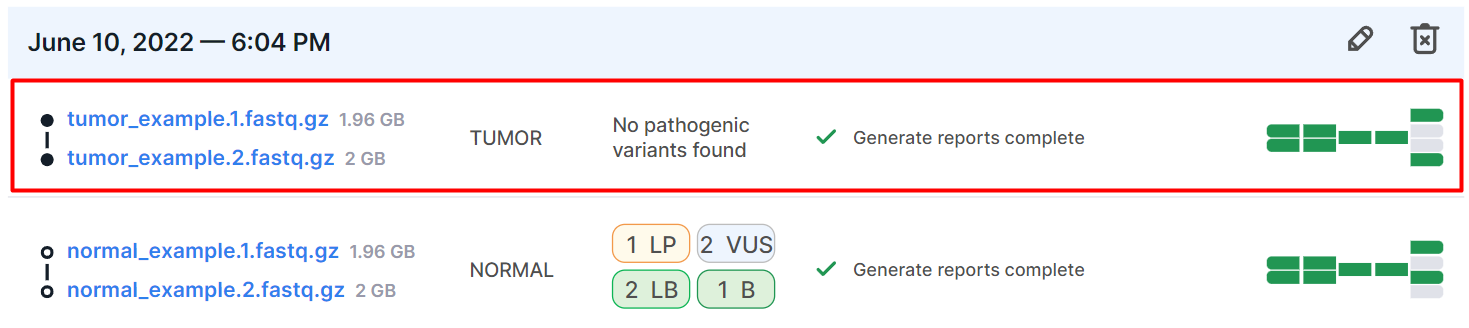
The sample row contains the following information:
- Sample file names (with extension) and sample file size. If the sample file is still being uploaded,
this will be reflected in the size information. For example, it will say "18 B of 240 KB". Tumor sample file is
designated as
 , non-tumor sample file as
  . A pair of tumor sample files:
  , a pair of non-tumor sample files:
  .
. - Sample type is the type that was selected when uploading the sample (TUMOR or NORMAL (non-tumor)). You can change the sample type in the editing window (see above).
- Sample interpretation summary is the information on the number of variants of a particular pathogenicity
class discovered in the sample
and included to report (Pathogenic:
 , Likely pathogenic:
  , Uncertain significance:
  , Likely benign:
  , Benign:
  ).
Interpretation summary is displayed
if the sample interpretation has been completed
or if a variant with a particular pathogenicity has been included to report.
If the interpretation has not been completed, but variants with a particular pathogenicity class have been
included to report, then the interpretation summary will be "Interpretation not completed". If the
sample interpretation has been completed, but no variants with a particular pathogenicity class have been
included to report, then the interpretation summary will be "No pathogenic variants found".
).
Interpretation summary is displayed
if the sample interpretation has been completed
or if a variant with a particular pathogenicity has been included to report.
If the interpretation has not been completed, but variants with a particular pathogenicity class have been
included to report, then the interpretation summary will be "Interpretation not completed". If the
sample interpretation has been completed, but no variants with a particular pathogenicity class have been
included to report, then the interpretation summary will be "No pathogenic variants found". - The last completed analysis stage status or the status of the stage currently being
in progress:
 - the stage is currently in progress;
 - the stage is queued or waiting for the prerequisite stages of the control sample to be completed (in the case of a tumor sample from a pair of tumor/normal samples);
 - the stage was completed successfully,
 - the stage was completed successfully, but not all quality metrics meet the criteria,
 - the stage was failed.
 - Sample analysis progress tiles. Each tile is an analysis stage.
Blue tiles
 represent stages in progress or queued or waiting for the prerequisite stages of the control sample to be completed (in the case of a tumor sample from a pair of tumor/normal samples); green
  - successfully completed stages; orange
  - stages completed successfully with non-critical problems; red
  - failed stages; gray
  - stages that have not been completed
(either because these stages are turned off, or because the previous analysis stages, the results of which are
necessary to complete the stage, have not yet been completed). The number of tiles may vary depending
on the possible course of the analysis:
- stages that have not been completed
(either because these stages are turned off, or because the previous analysis stages, the results of which are
necessary to complete the stage, have not yet been completed). The number of tiles may vary depending
on the possible course of the analysis:
- The analysis progress tiles of the sample in FASTQ
or BAM format:

- The analysis progress tiles of the sample in VCF, TXT
or TSV format:

Patient Info#
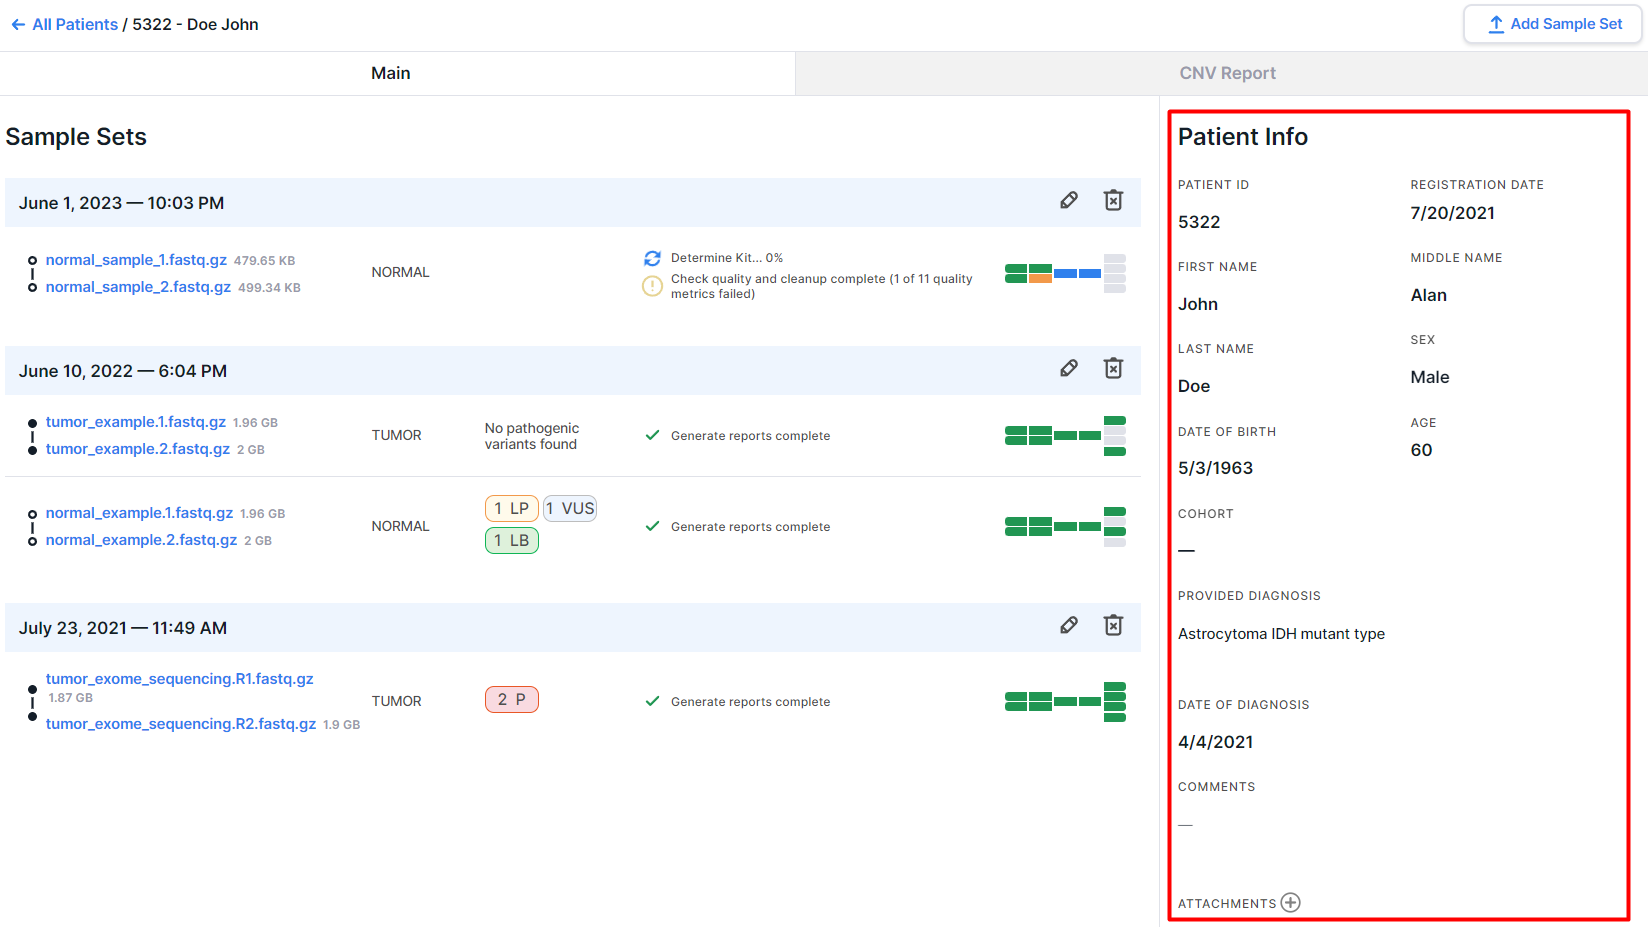
- PATIENT ID is a code entered when creating a patient (you can edit it by clicking on the code). Can include any characters.
- REGISTRATION DATE is the patient creation date in M/d/yyyy format.
- LAST NAME, FIRST NAME, MIDDLE NAME of the patient. Can be specified by clicking on the value fields.
- SEX of the patient: male, female. Sex can be specified by clicking on the value field and selecting the value from the drop-down list.
- DATE OF BIRTH of the patient in M/d/yyyy format. Can be specified by clicking on the value field.
- AGE of the patient is calculated automatically after entering the patient's date of birth.
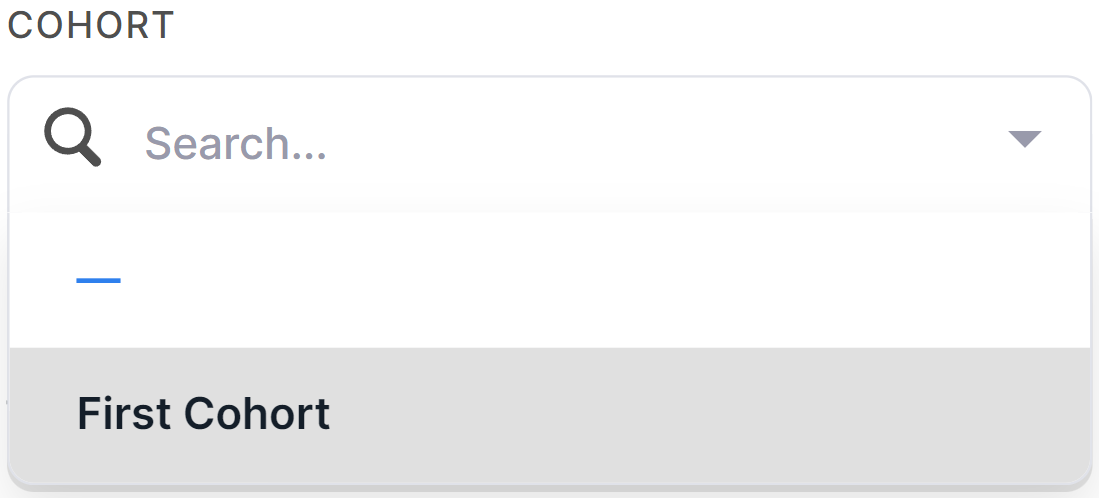
- COHORT is a group of patients associated by a common feature (for example, by pathology type or data source). You can read more about cohorts and their creation in the corresponding section. To add a patient to an already created cohort, click on the value field and select the cohort in the drop-down list:
- PROVIDED DIAGNOSIS is the patient's diagnosis at the time the sample was taken for sequencing. Can be specified by clicking on the value field.
- DATE OF DIAGNOSIS in M/d/yyyy format. Can specified by clicking on the value field.
- COMMENTS is a field for additional information about the patient. A comment can be added by clicking on the value field.
- ATTACHMENTS are the additional files of any format. To attach a file,
click on
 and drag and drop files
or folder containing files into the drop-area, or click on it to open the File Browser:
and drag and drop files
or folder containing files into the drop-area, or click on it to open the File Browser:

In the same way, you can attach as many files as you need. To remove an attachment, hover over it and
click on ![]() . To download an attached file,
click on its row.
. To download an attached file,
click on its row.