Uploading Samples for New Patient
After creating a new patient (as described here), you will be on his page.
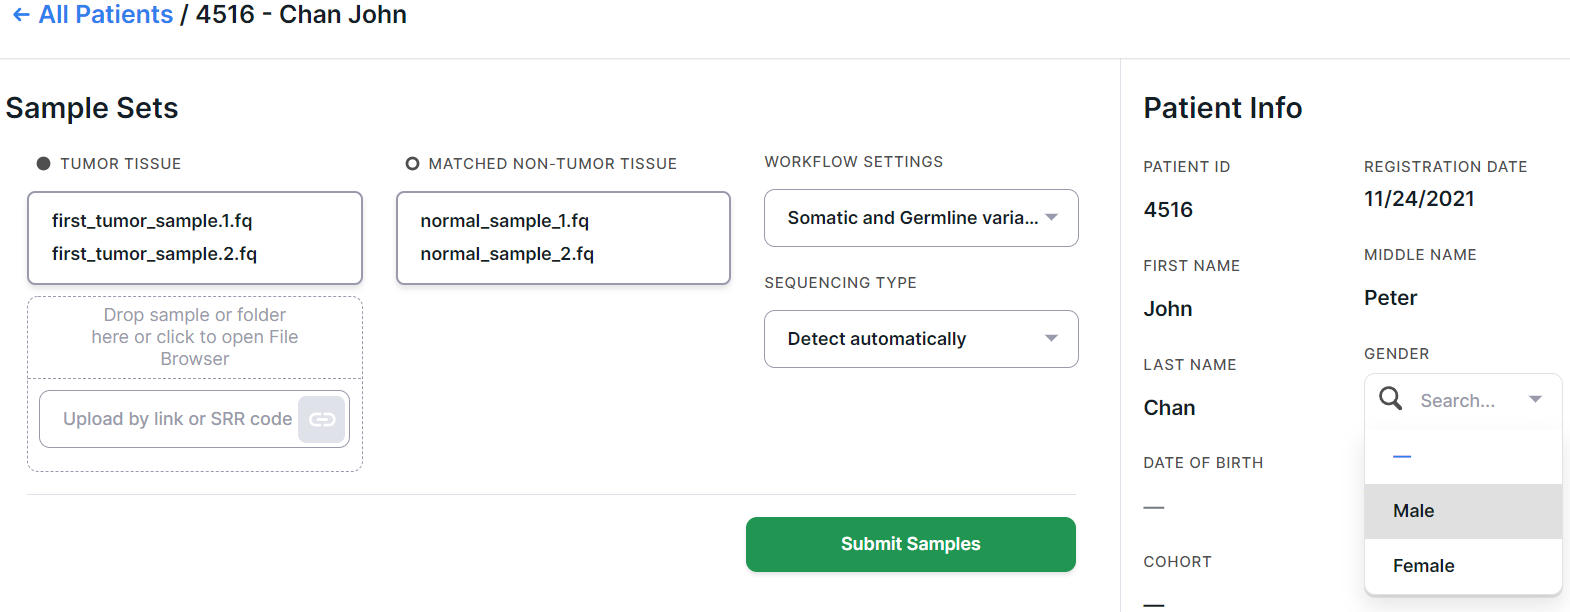
Select the needed workflow setting (as described here).
Upload tumor sample(s) into the "TUMOR TISSUE" window and normal sample into the "MATCHED NON-TUMOR TISSUE" window:
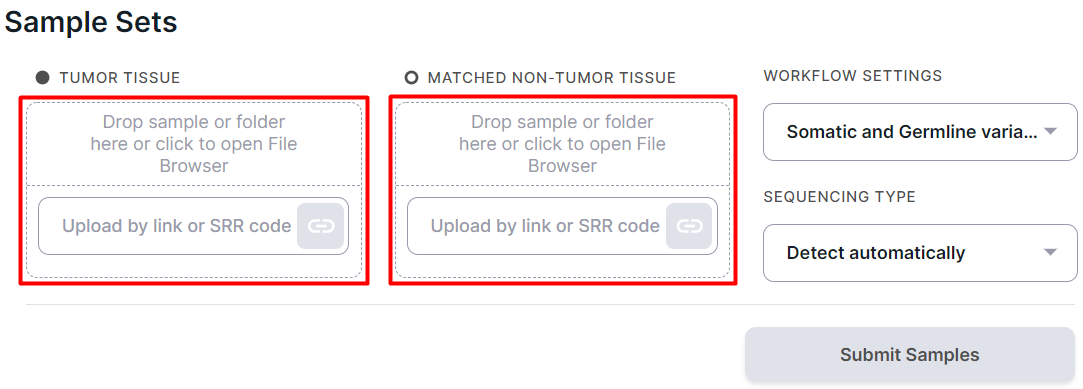
Attention!
Please note that the sample set must contain samples from the same patient.

The sample files can be uploaded:
- From computer
- From FTP, HTTP or Yandex.Disk servers
- From Google Drive
- From NCBI SRA database
To upload, drag and drop files or folder containing files into the drop-area or click on it to open the File Browser:
To upload, paste the link to the file or folder containing files on the server into the placeholder:
and click on the button ![]() or press Enter on the keyboard.
or press Enter on the keyboard.
To upload a file from Google Drive, first share the file with anyone with the link (how to do this is described here).
Paste the resulting link into the window:
and click on the button ![]() or press Enter on the keyboard.
or press Enter on the keyboard.
To upload, paste the run code from NCBI SRA (e.g. SRR24755541) into the placeholder:
and click on the button ![]() or press Enter on the keyboard.
or press Enter on the keyboard.
Samples uploaded by mistake can be deleted by hovering over their card and
clicking on ![]() .
.
Recognizing paired files#
- If your sequencing is paired-end and a pair of FASTQ files of the same sample is named in an Illumina convention (or even by some other common read naming scheme), the files will be automatically recognized as a pair when added:

- If the pair is not recognized correctly, you can manually unlink files by hovering over the pair and
clicking on
 :
:
- If the automatic pair recognition did nоt succeed, you can manually pair the files. To do this, either drag the mate paired-end file to the primary one:

or click on the paperclip in the primary file card and then click on the mate file:

Merging sequencing lanes#
- If your sequencing sample consists of multiple FASTQ files that correspond to different lanes on the
flow cell and are named the same except for the sequencing lane designation:
_L[lane number](e.g. "_L01"), then the lane files will automatically be merged into one sample. In this case, pairing will be taken into account for the lanes in the same way as described above, i.e. paired lane files will be merged into a paired sample, and unpaired lane files will be merged into an unpaired sample.
An example of merging four paired lanes into one sample:
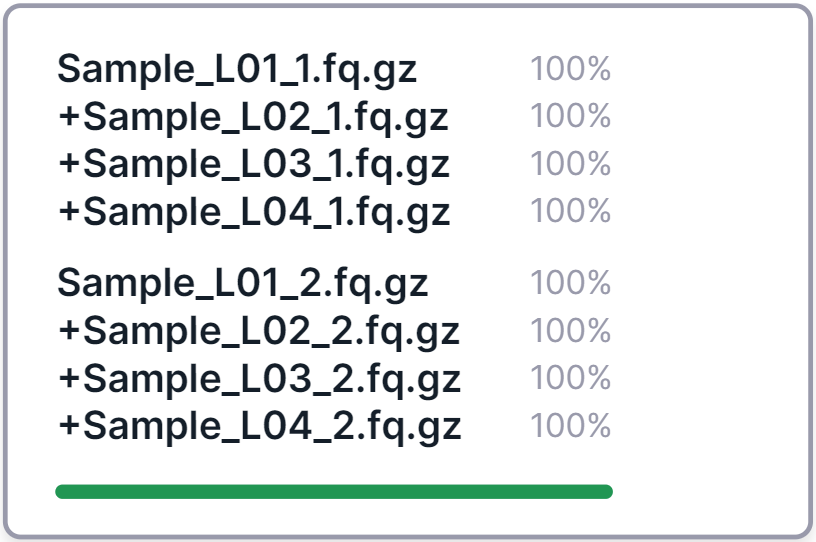
The first file in the merged sample card is the one with the lowest lane number among the others, and the remaining lanes are added to it, symbolized by a plus in front of their names.
- If the files are merged incorrectly, you can split them by clicking on
the button
 , which is located under all
uploaded files in the "Uncategorized samples" section.
, which is located under all
uploaded files in the "Uncategorized samples" section. - If the necessary files are not merged into one sample, then you can merge them manually, either by
dragging the card of one lane file to another (to merge these two files), or by clicking on
the button
 , which is located under all
uploaded files (to merge all uploaded files). Note that the button will be available only if there are samples
of the same pairing in the "Uncategorized samples" section (i.e. either all samples are paired or all samples
are unpaired).
, which is located under all
uploaded files (to merge all uploaded files). Note that the button will be available only if there are samples
of the same pairing in the "Uncategorized samples" section (i.e. either all samples are paired or all samples
are unpaired).
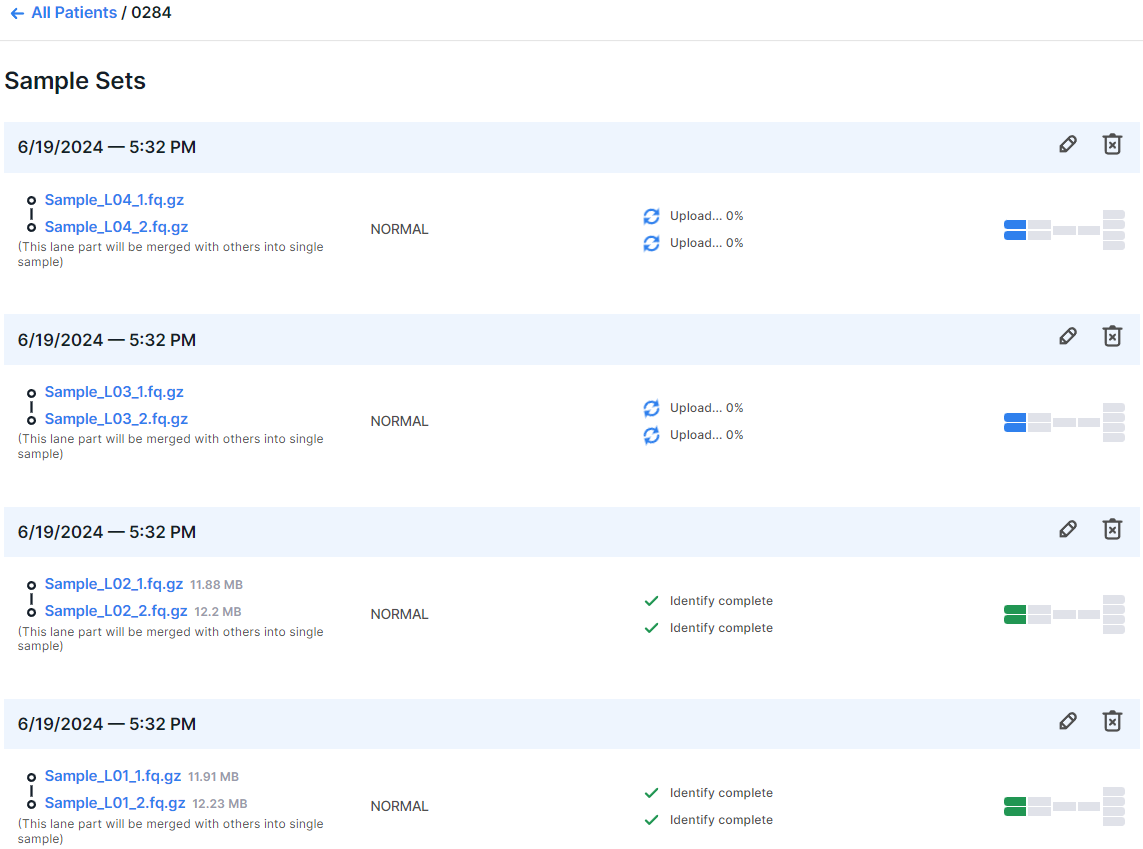
note
After running the analysis, a sample consisting of multiple lanes will initially appear as multiple samples. At the bottom of each "sample" (which is actually a part of the future sample) it will be indicated that "This lane part will be merged with others into single sample". The merging of lanes into one sample will occur after the successful completion of the uploading and identification stages for all the lanes of the sample.
Filling out the patient card#
After adding samples, you can fill out the patient card. We recommend filling out the card right away and documenting the added samples thoroughly - this will make it easier for you to interpret and navigate later.
You can add the details later on this patient's personal page.
Sequencing type#
The sequencing type is usually detected automatically by Genomenal. However, if you are sure which sequencing type was used to obtain your data, select the appropriate type to speed up the analysis. This can be whole genome sequencing (WGS) or targeted selection (sequencing with a targeted panel or whole-exome sequencing (WES)).After selecting "Targeted selection" as the sequencing type, you will see an additional field "Capture kit features". The capture kit used during sequencing can be detected automatically by Genomenal. But if you are sure which targeted panel was used when obtaining your data, you can select it from the list of built-in or already uploaded panels in the system, as well as upload the appropriate capture kit by opening the drop-down list in the "Capture kit features" field and selecting the
option
 . Then you will see a field with the choice of a reference genome for the capture kit. By default, the reference genome assembly corresponding to the genomic intervals of the uploaded capture kit is detected automatically by Genomenal. You can determine the assembly by clicking on the appropriate field and selecting the assembly in the drop-down list: hg19 or hg38. Then click on the button
  and select the panel file in the opened File Browser.
Please note that by selecting the sequencing type and capture kit, you define them for all samples of set at once.
Run analysis#
Click on  to start sample analysis.
Attention!
If you're uploading sample files from a computer, and not by a link, do not refresh or close the tab where files are being uploaded until it's complete. Otherwise, the upload will be interrupted. To resume an interrupted upload, you can use the form described in the corresponding section. After the upload is completed, you can close the tab, browser and turn off the computer - further analysis does not depend on your device.
You can track the sample processing on its page or through notifications about its processing completion.