Custom Annotations
If you want to annotate discovered variants using additional data, upload a custom annotation containing this data. In addition, you can add to the system pathogenicity database, annotation from COSMIC database, frequency database and annotation from RUSeq database.
To open the section with custom annotations, go to the "Custom annotations" page from the "Settings" page block through the navigation panel on the left:

Adding a Custom Annotation#
To open the page for adding a custom annotation,
click on  .
On the page that opens, you can specify annotation name and type a description
by clicking on "-" (by default, the annotation name will be the file name):
.
On the page that opens, you can specify annotation name and type a description
by clicking on "-" (by default, the annotation name will be the file name):

1. Upload file#
Upload the annotation file in VCF, CSV or TSV format. To do this, drop the file into the window or click on it to open File Browser:

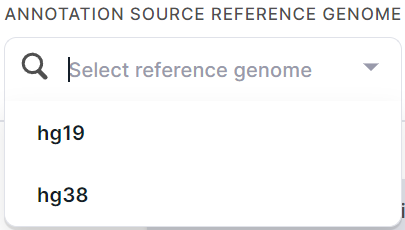
Specify annotation source reference genome build (hg19 or hg38) for proper variant identification:
Immediately after uploading, you will see a preview of the first 7 lines of the annotation.
2. Defining the type of a custom annotation#
The following types of custom annotations are available for adding:
- Pathogenicity database is an annotation that contains a column with the pathogenicity classes of the variants. The following numeric or text values are supported for a column:
- "1" or "Benign";
- "2" or "Likely_benign";
- "3" or "Uncertain_significance";
- "4" or "Likely_pathogenic";
- "5" or "Pathogenic".
If the uploaded annotation has a column with such values, the system will prompt you to define this annotation as the pathogenicity base. To do this, click on the switch:

The result of annotation of variants by pathogenicity base will be presented in the "Pathogenicity" column in the SNV Viewer.
info
As a pathogenicity database, you can define as many user annotations as you like - all of them will be used in the annotation, if they do not overlap in variants. If a variant exists in several pathogenicity databases, then it will be annotated by the one that was uploaded last.
- COSMIC database is an annotation in VCF format, which contains a column with variant IDs from the COSMIC database (COSV********). If the uploaded annotation has a column with such values, the system will prompt you to define this annotation as a COSMIC database. To do this, click on the switch:

The result of annotation of variants by COSMIC will be presented in
the "External links" column in the SNV Viewer: ![]() .
.
info
Only one custom annotation can be defined as a COSMIC database. When defining a new annotation as a COSMIC database, the definition of the previous annotation is deleted.
- Frequency database is an annotation in TSV or CSV format, which contains "Samples_with_SNP" column with the number of samples in which the variant was discovered and "Number_of_samples" column with the total number of samples tested (both columns' values are natural numbers). If the uploaded annotation has the columns with such values, the system will prompt you to define this annotation as a frequency database. To do this, click on the switch:

The result of annotation of variants by frequency database will be used to calculate the probability of the variant detection when generating ClinVar phenotypes report.
info
Only one custom annotation can be defined as a frequency database. When defining a new annotation as a frequency database, the definition of the previous annotation is deleted.
- RUSeq database is an annotation in VCF format, which contains the following columns from RUSeq database: "AC", "AF", "AN", "BaseQRankSum", "CSQ", "ExcessHet", "FS", "InbreedingCoeff", "MLEAC", "MLEAF", "MQ", "MQRankSum", "QD", "ReadPosRankSum", "SOR", "VQSLOD", "culprit", "MEAN_DP", "MIN_DP", "MEAN_GQ", "AC_diseased", "AF_diseased", "AN_diseased", "n_hom_diseased", "AC_healthy", "AF_healthy", "AN_healthy", "n_hom_healthy", "AC_clust1", "AF_clust1", "AN_clust1", "n_hom_clust1", "AC_clust2", "AF_clust2", "AN_clust2", "n_hom_clust2", "AC_clust3", "AF_clust3", "AN_clust3", "n_hom_clust3".
If the loaded annotation has all the columns listed above If the uploaded annotation has all columns listed above, the system will prompt you to define this annotation as RUSeq database. To do this, click on the switch:

As a result of variant annotation by RUSeq database, you will see in SNV Viewer:
- a link to the variant in RUSeq database
in "External links" column or
on "Common" tab of the variant details panel:
 ;
; - the variant alternative allele frequency in RUSeq database in "RUSeq AF" column (not added by default).
info
Only one custom annotation can be defined as RUSeq database. When defining a new annotation as RUSeq database, the definition of the previous annotation is deleted.
- An annotation with any other information about the variant - in this case, you don't need to define the annotation type. The result of the variant annotation by all custom annotations is presented on "Custom annotation sources" tab of the variant details panel:

3. Map columns#
If you have uploaded an annotation file in VCF format, the columns required to identify a variant (CHROM, POS, REF, ALT) will be determined automatically.
If you have uploaded an annotation file in CSV or TSV format, you need to define the columns required to identify a variant:

- CHROMOSOME is a column with the names of the chromosomes in which the variants are located.
- POSITION (1-BASED) is a column with start positions of variants.
- REFERENCE is a column with reference alleles of variants.
- ALTERNATIVE is a column with alternative alleles of variants.
To do this, select the appropriate column from the annotation you uploaded for each required column. For example, in this case, the "CHROMOSOME" column corresponds to the "chr" column from the annotation:

If you have defined an annotation as a pathogenicity database, then you need to define:
- a column with the gene name:

- a column with the pathogenicity classes of the variants (the column will be determined automatically, make sure that it was selected correctly)

If you have defined an annotation as a COSMIC database, then a column with variant ID from COSMIC will be determined automatically for annotation:

If you have defined an annotation as a frequency database, then the following columns will be determined automatically for annotation:
- a column with the number of samples in which the variant was discovered:

- a column with the total number of samples tested:

If you have defined an annotation as RUSeq database, then a column with the variant alternative allele frequencies from RUSeq ("AF") will be determined automatically for annotation:
4. Adding an annotation column#
- Not available if you have defined the annotation as a pathogenicity database.
- Available, but not required, if you have defined the annotation as a COSMIC database.
In the uploaded annotation, select the columns containing the data which you want to annotate the variants with:
- Click on
 .
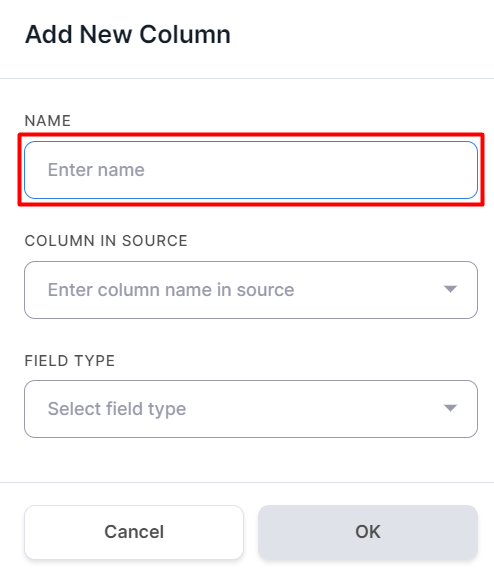
. - Enter the column name in the opened window:
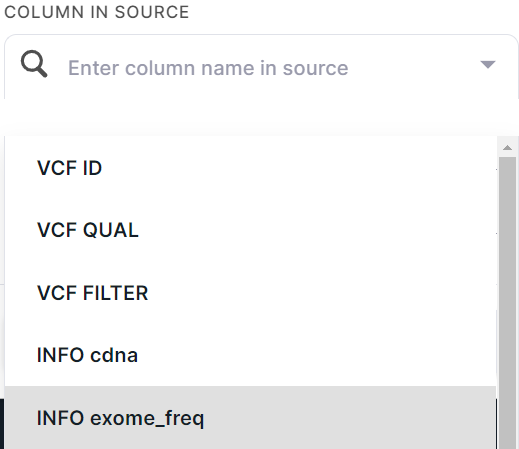
- Specify the selected column in the file. For instance, we have data with the frequencies of variants in the exome, and we want to annotate the discovered variants using this information. To do this, let's select the appropriate column in the file:
- Define the field type: text or numeric:

- Click on
 .
.
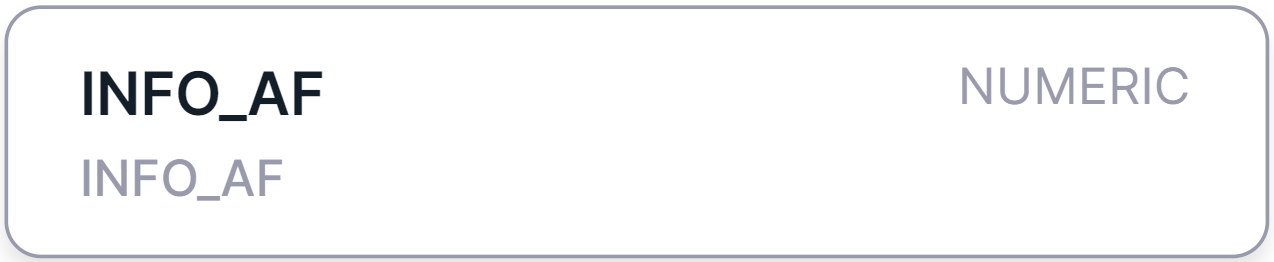
An annotation column will be added:

To edit a column, hover over it and
click on ![]() .
.
To remove a column, hover over it and
click on ![]() .
.
You can add multiple annotation columns in the same way.
5. Perform source preparation#
To perform the annotation preparation, click on  .
.
caution
If you skipped one of the required steps of creating an annotation (uploading file,
selecting source reference genome, filling in the required fields to identify a variant,
or adding at least one annotation column for annotations other than pathogenicity, COSMIC, frequency or
RUSeq databases),
then the button  will be inactive. Variants will not be annotated with such file that has not been processed.
While source preparation is in progress, the status will be "IN_PROGRESS":

A successfully prepared annotation will have the status "SUCCESS":

or "PROBLEMS" if non-critical problems occurred during processing (more details about the problems can be found below in the "Warnings" section):

Processing of an annotation prepared incorrectly will fail with the "FAILED" status (more details about the error can be found below in the "Errors" section):

In such a situation, correct one of the annotation preparation steps (select the correct reference genome, specify the correct annotation column type) or upload another annotation file.
To return to the list of all custom annotations,
click on  .
.
The values of the columns selected for the annotation of variants will be located on the SNV Viewer page and in the file with variants, which can be downloaded from the main page of the sample.
Editing a Custom Annotation#
- If you want to edit an already prepared annotation (add, remove or edit annotation columns, change source
reference genome or change the selection of required fields), you can do it on its page. To do this, make
the necessary changes and click on
 . To cancel the changes made, click on
  or
just leave the page - the changes will not be saved.
or
just leave the page - the changes will not be saved.

- If you want to stop defining an already prepared annotation as pathogenicity, COSMIC, frequency or RUSeq database, turn off the corresponding toggle on the annotation page. In this case, you do not need to save changes.
tip
If you want a newly created or edited annotation to annotate variants of a sample for which the "SNVs/Indels Annotation" stage has already been completed, restart the sample processing or this stage.
Deleting a Custom Annotation#
To remove a custom annotation, follow these steps:
Hover over the annotation line on the "Custom annotations" page;
Click on
 ;
;In the window that appears, confirm your actions by clicking on
 .
.
note
Deleted annotation data will be saved and marked "deleted" for variants that were annotated with it before it was deleted:
