Settings
The "Settings" section includes the pages "Settings presets", "Report templates", "Gene panels", "Capture kits" and "Custom annotations".
Settings presets#
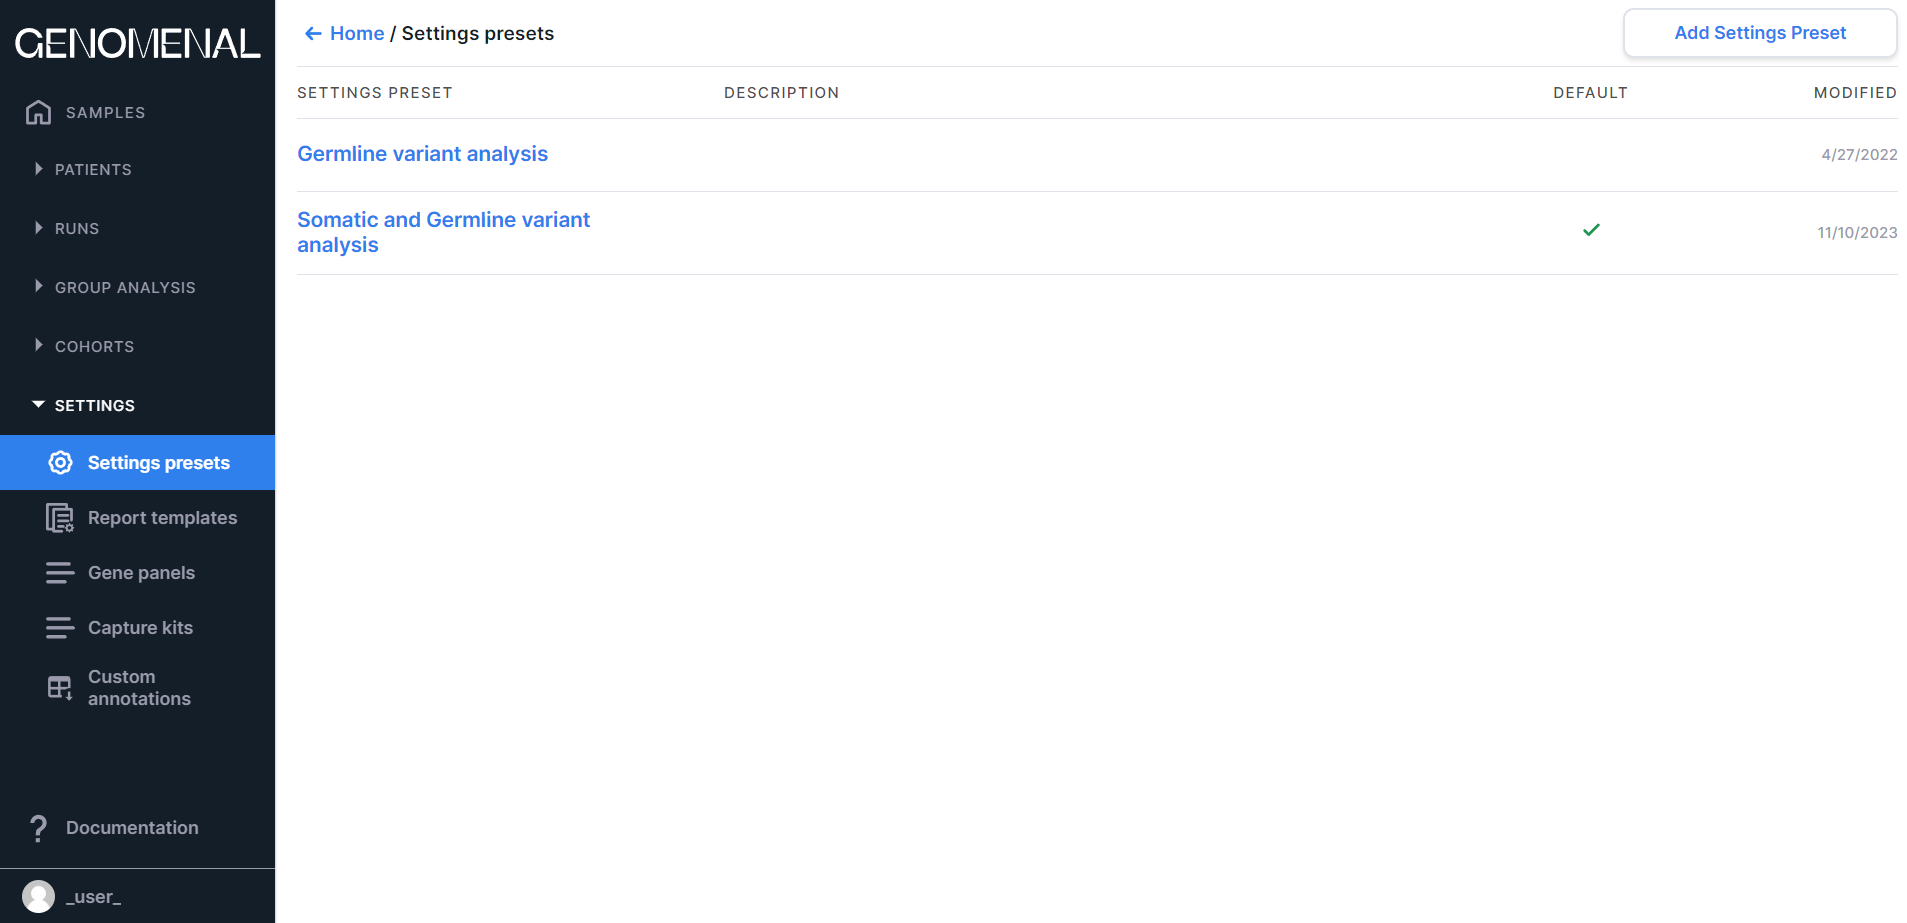
The page contains preset settings for sample analysis. You can read more about settings presets here.
note
The number and type of preset settings depends on the initial settings made by the System administrator.
At the top of the page there is
a button
to create settings preset.
Information on the page is presented as a table with the following columns:
- SETTINGS PRESET - contains the settings preset name;
- DESCRIPTION - contains the settings preset description;
- DEFAULT - the settings preset that contains the
checkmark
is selected by default for sample analysis;
- MODIFIED - contains the date of the last change in the settings preset in M/d/yyyy format.
The table is sorted by settings preset names.
If you hover over a settings preset's row, you will see the following active
elements: to set a default preset and
to archive preset.
Report templates#
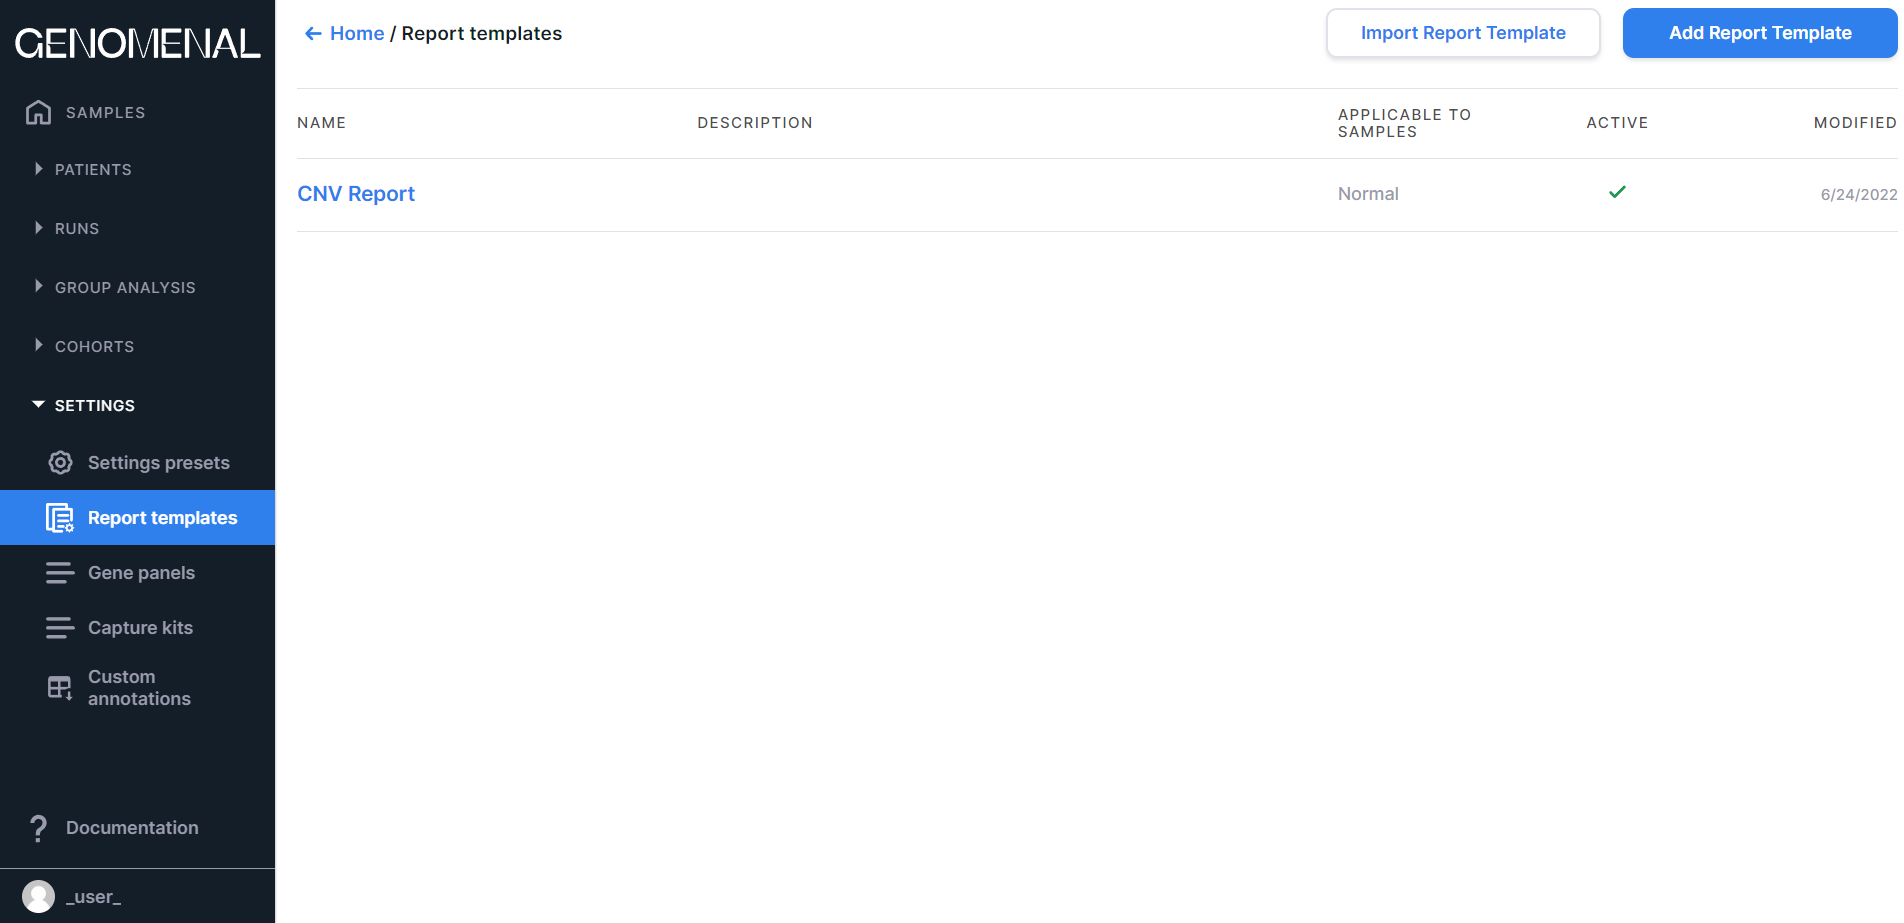
The page contains report templates designed to present the results of sample analysis in the form of reports. You can read more about report templates here.
note
The number and type of report templates depends on the initial settings made by the System administrator.
At the top of the page there are the following
buttons: to import report template and
to
create a template.
Information on the page is presented as a table with the following columns:
- NAME - contains the report name (names the report tab on the sample page);
- DESCRIPTION - contains the report template description;
- APPLICABLE TO SAMPLES - contains information about the type of samples to which the template is applicable: Any, Tumor, or Normal;
- ACTIVE - those report templates that contain the
checkmark
are active (so they will be used in the presentation of the results of the analysis of the samples of the corresponding type);
- MODIFIED - contains the date of the last change in the report template in M/d/yyyy format.
The table is sorted by report template names.
If you hover over a report template's row, you will see an active
element to delete template.
Gene panels#
The page contains gene sets, which you can use to filter the analysis results. You can read more about gene panels here.
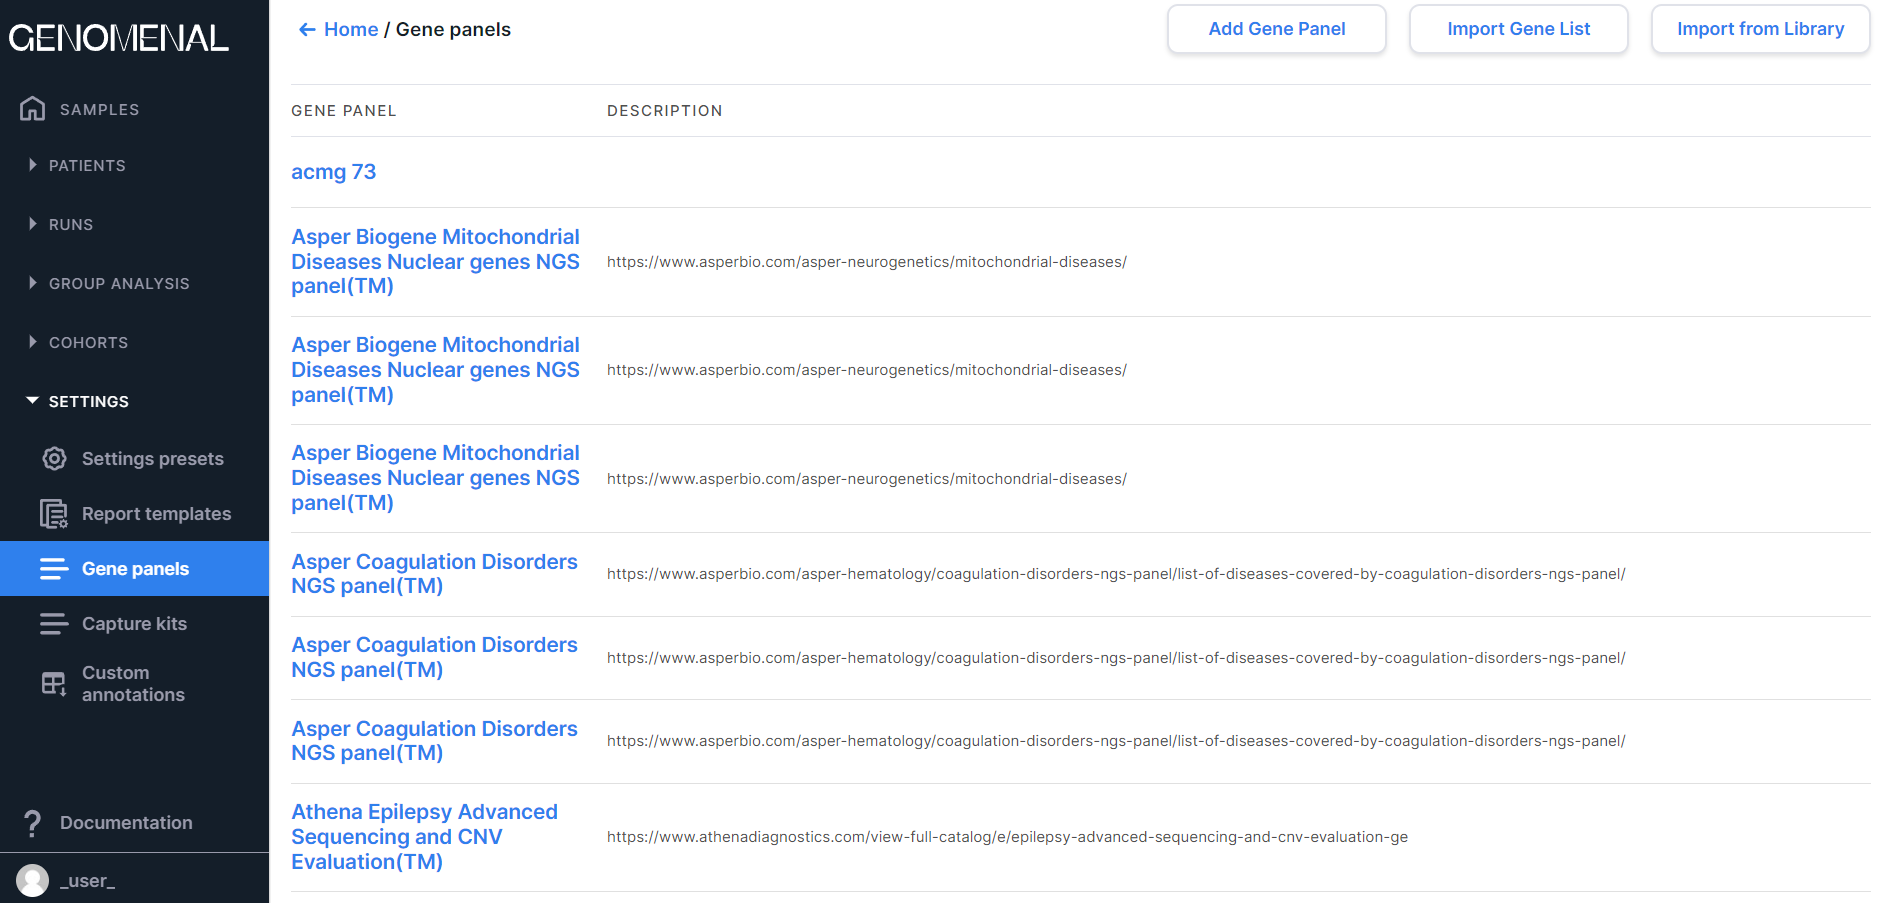
At the top of the page there are the following
buttons: to create a panel by selecting genes from a list of all genes or adding genes associated with a specific term from Human Phenotype Ontology, and
to create a panel by importing the prepared gene list, and
to import a panel
from the library of the most common clinical panels uploaded by the System administrator.
Information on the page is presented as a table with the following columns:
- GENE PANEL - contains the gene panel name;
- DESCRIPTION - contains the gene panel description.
The table is sorted by gene panel names.
If you hover over a gene panel's row, you will see an active
element to delete panel.
Capture kits#
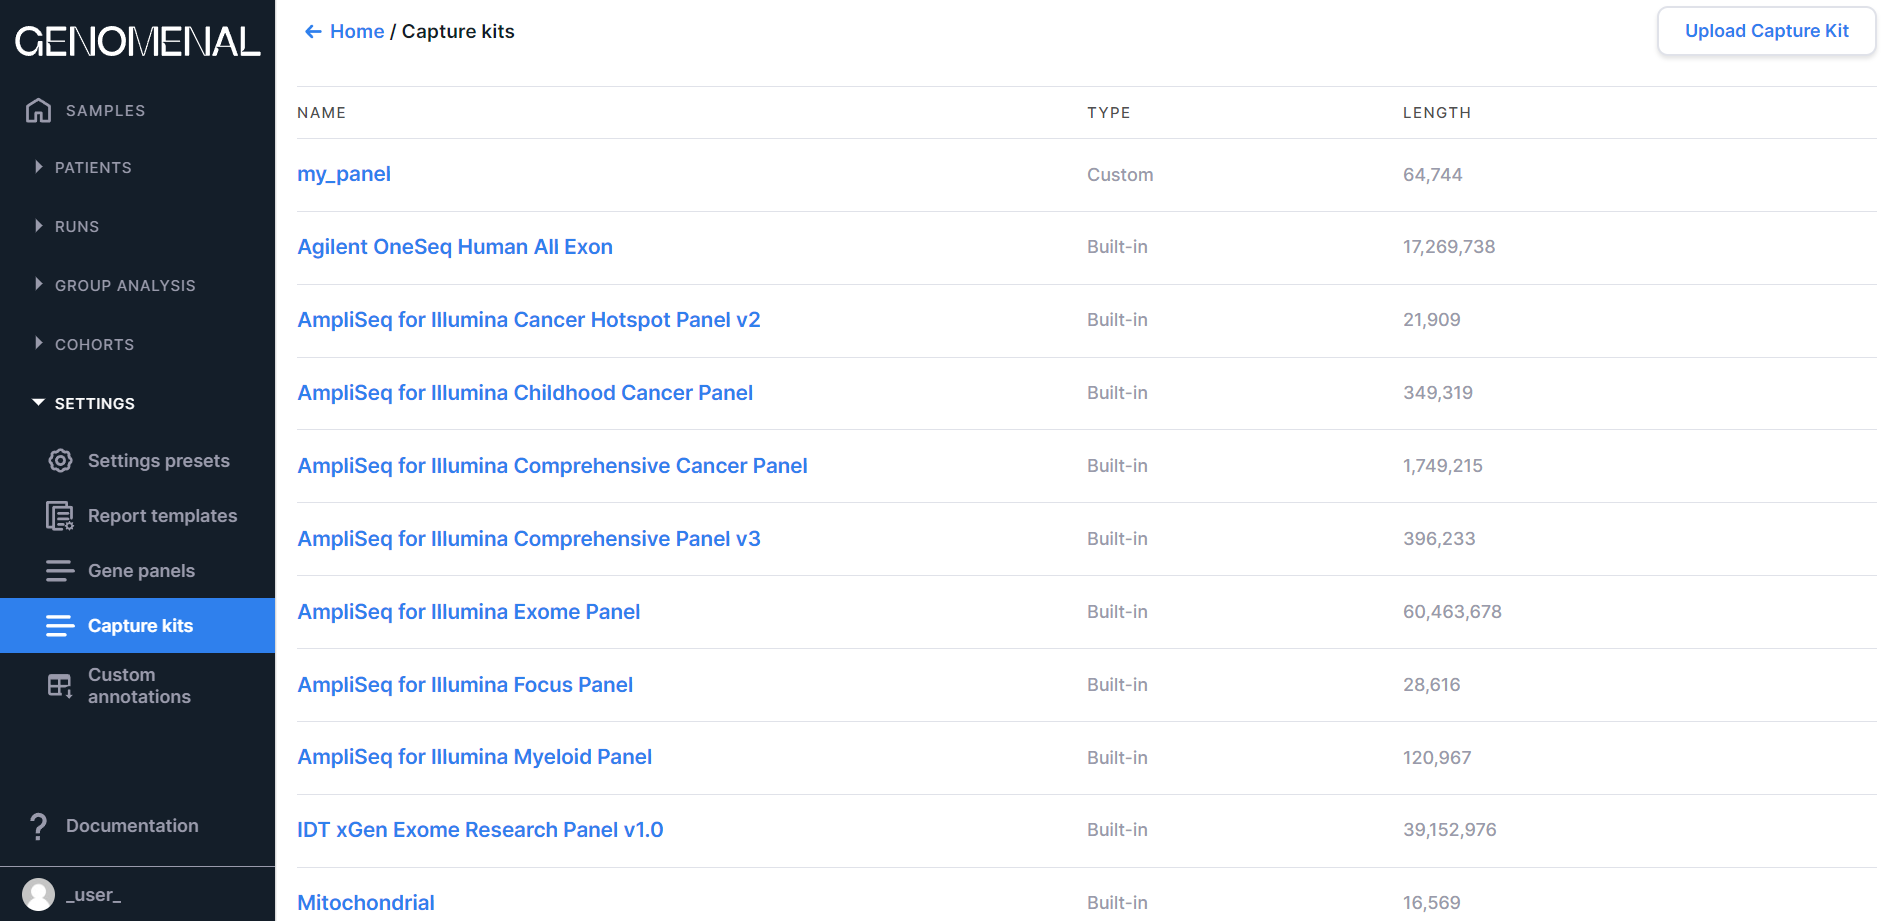
The page contains built-in and uploaded capture kits that can be specified when uploading targeted sequencing results for more accurate and faster analysis. You can read more about capture kits here.
At the top of the page there is a button to
upload capture kit file.
Information on the page is presented as a table with the following columns:
- NAME - contains the capture kit name (the name of uploaded capture kit file). If you click on the capture kit name, you can download the capture kit file in BED format;
- TYPE - contains information about the type of capture kit: Built-in, or Custom (uploaded by user);
- LENGTH - contains information about the total length of the capture kit across all genomic intervals.
The table is sorted first by capture kit type (custom kits go first, then built-in kits), and then by capture kit names.
If you hover over a capture kit's row, you will see the following active
elements: to download the uploaded capture kit file (file before the processing) in BED format, and
to delete capture kit.
Custom annotations#
The page contains the uploaded annotations by which the discovered variants will be annotated. You can read more about custom annotations here.
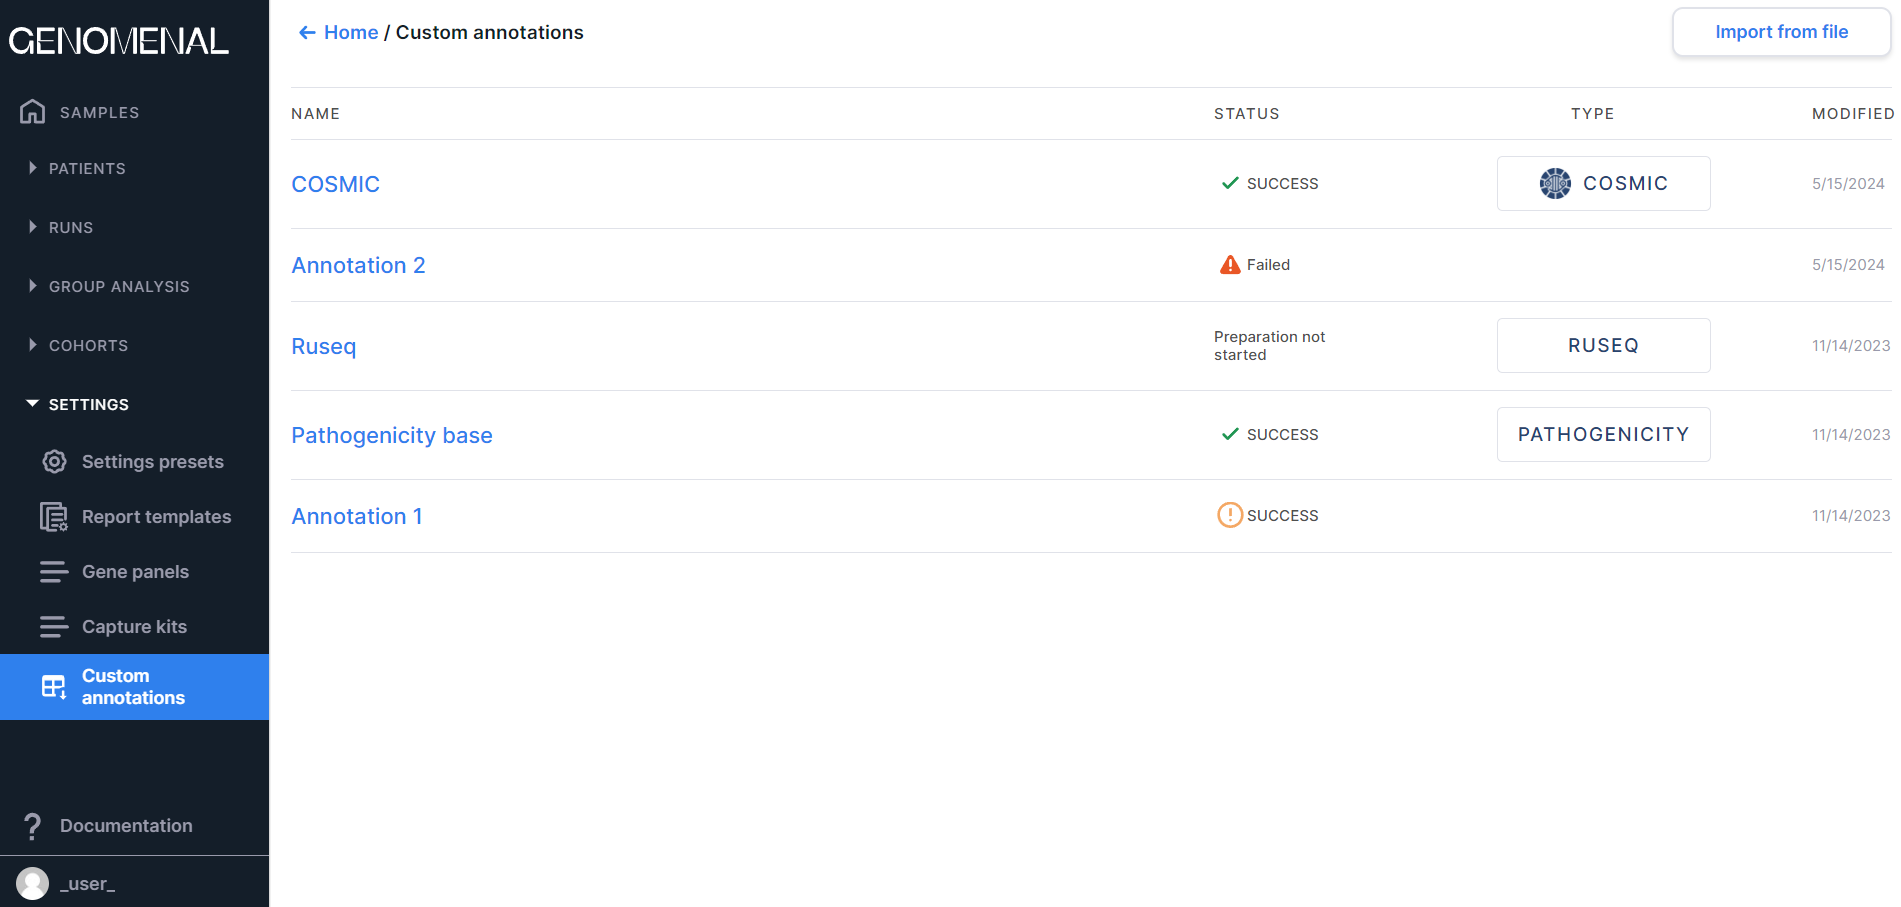
At the top of the page there is a button to
add custom annotation.
Information on the page is presented as a table with the following columns:
- NAME - contains the custom annotation name (can be set or changed until the annotation is successfully processed, otherwise matches the name of the uploaded annotation file);
- STATUS - contains information about the statuses of uploaded
annotations:
- the annotation preparation has not been started yet;
- the annotation preparation has started but not yet completed;
- the annotation preparation completed successfully;
- the annotation preparation has completed successfully, but there were non-critical problems during processing (details can be found on the custom annotation page in "Status" section);
- the annotation preparation failed (details can be found on the custom annotation page in "Status" section);
- TYPE - if the annotation has
type it is used as COSMIC database; if the annotation
hastype it is used as pathogenicity database (data on the variant pathogenicity); if the annotation has
 type it is used as frequency database (data on the variant occurrence in the population); if the annotation has
 type it is used as RUseq database;
- MODIFIED - contains the date of the last change in the custom annotation in M/d/yyyy format.
The table is sorted by the date custom annotations were added (most recently added annotations to earlier added annotations).
If you hover over a custom annotation's row, you will see an active
element to to delete annotation.