Basic Filtering of Variants
Basic filtering columns are at the top of the table:

info
On "Profile settings" page, you can configure which filtering mode you will see when you first open the sample SNV Viewer page: Basic or Advanced.
Basic Filters#
info
On "Profile settings" page, you can change the choice of basic filters. The following describes in detail those filters that are chosen by default.
note
Table filtering is saved when you exit the SNV Viewer page.
1. Origin#
- Filtering by mutation type: Somatic, Germline.
note
"Origin" filter column is hidden in the Basic Filtering mode of SNV Viewer with germline mutations.
Both here and in all subsequent cases, the filtering algorithm is as follows:
- Click on the filter window;
- Select the needed filtering option from the drop-down list, or type the option you are looking for in the search box and select from the found.
Done! Filter applied. The selected filter can be seen in the window (in this case, the "Somatic" origin is selected):

2. Gene panel#
- Filtering variants by localization in certain genes from the panel. You can add a gene panel on "Gene Panels" page or import a panel from the Library of the most common clinical panels. To import, click on "Import from Library":

Select the required panels by ticking them in the window that opens:

and click on  to add panel.
3. Gene#
- Filtering variants by localization in the gene transcript. The transcript is given in brackets next to the official gene name. You can filter variants by several genes at once. To do this, tick the required genes and click outside the value area:

If several transcripts are known for a gene, the list presents all of them:
![]()
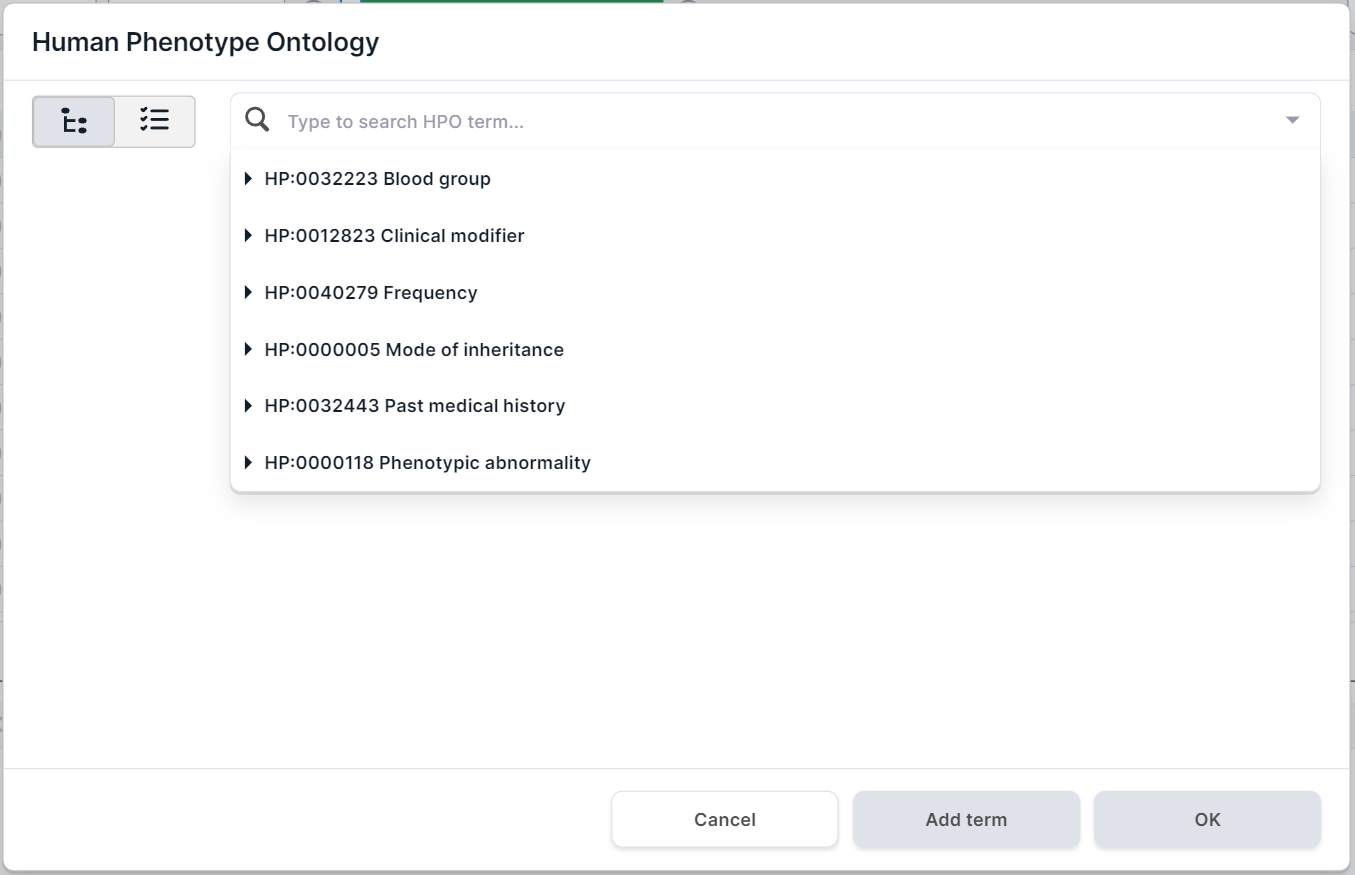
4. HPO#
- Filtering variants by localization in genes associated with terms from Human Phenotype Ontology (HPO). Click on the HPO filter container to open the phenotype search form. The form presents the main groups of phenotypes in the drop-down list:
Ways to search and select a term for filtering:
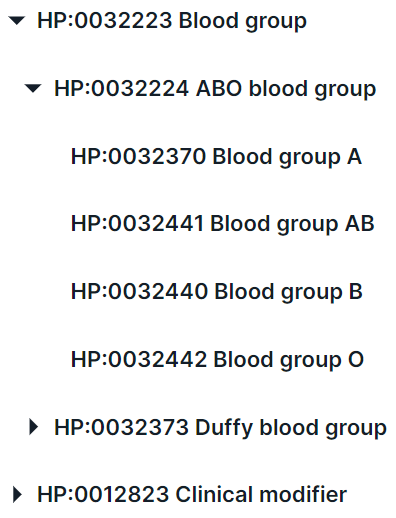
- Search for a term in the drop-down list. You can interact with term groups
using
 and
and  to
expand and collapse the list of group phenotypes, respectively:
to
expand and collapse the list of group phenotypes, respectively:
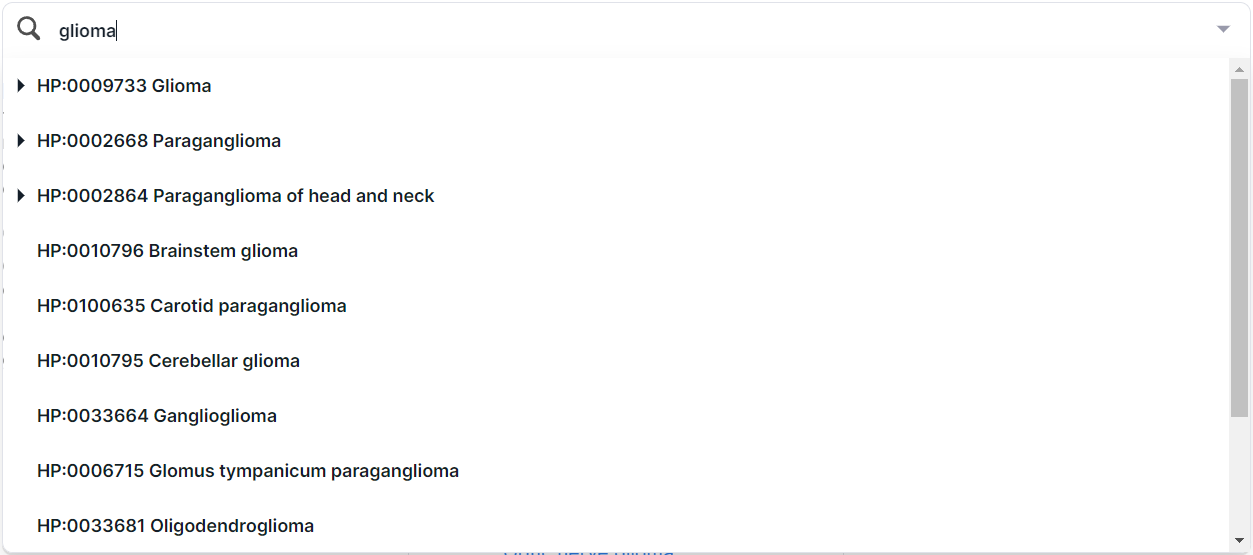
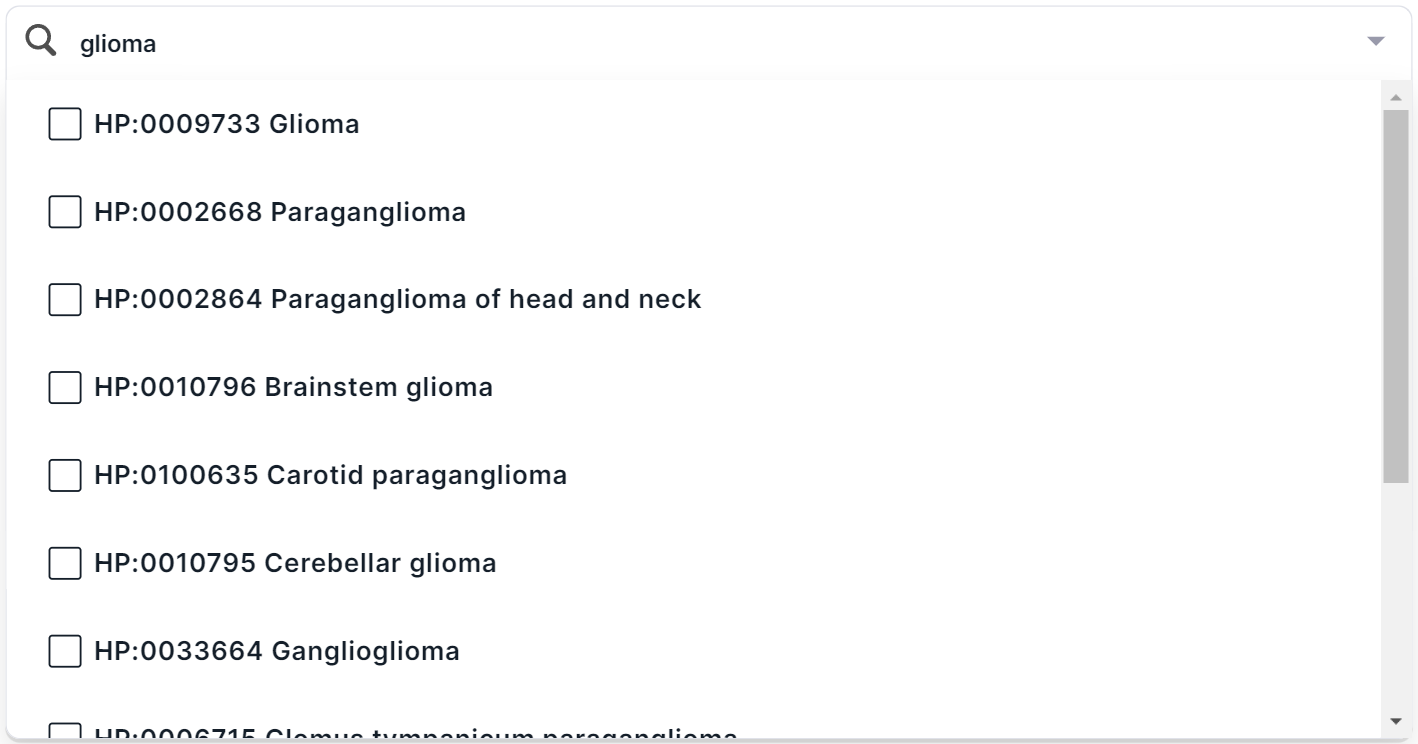
In addition, you can find a phenotype by searching for the name or ID from HPO. For example, when searching for the disease “glioma”, several terms are found:
To select a term to filter, click on its row. You can choose both the whole group and a specific phenotype. By selecting one of the terms (e.g. "Glioma"), you will see this disease card:
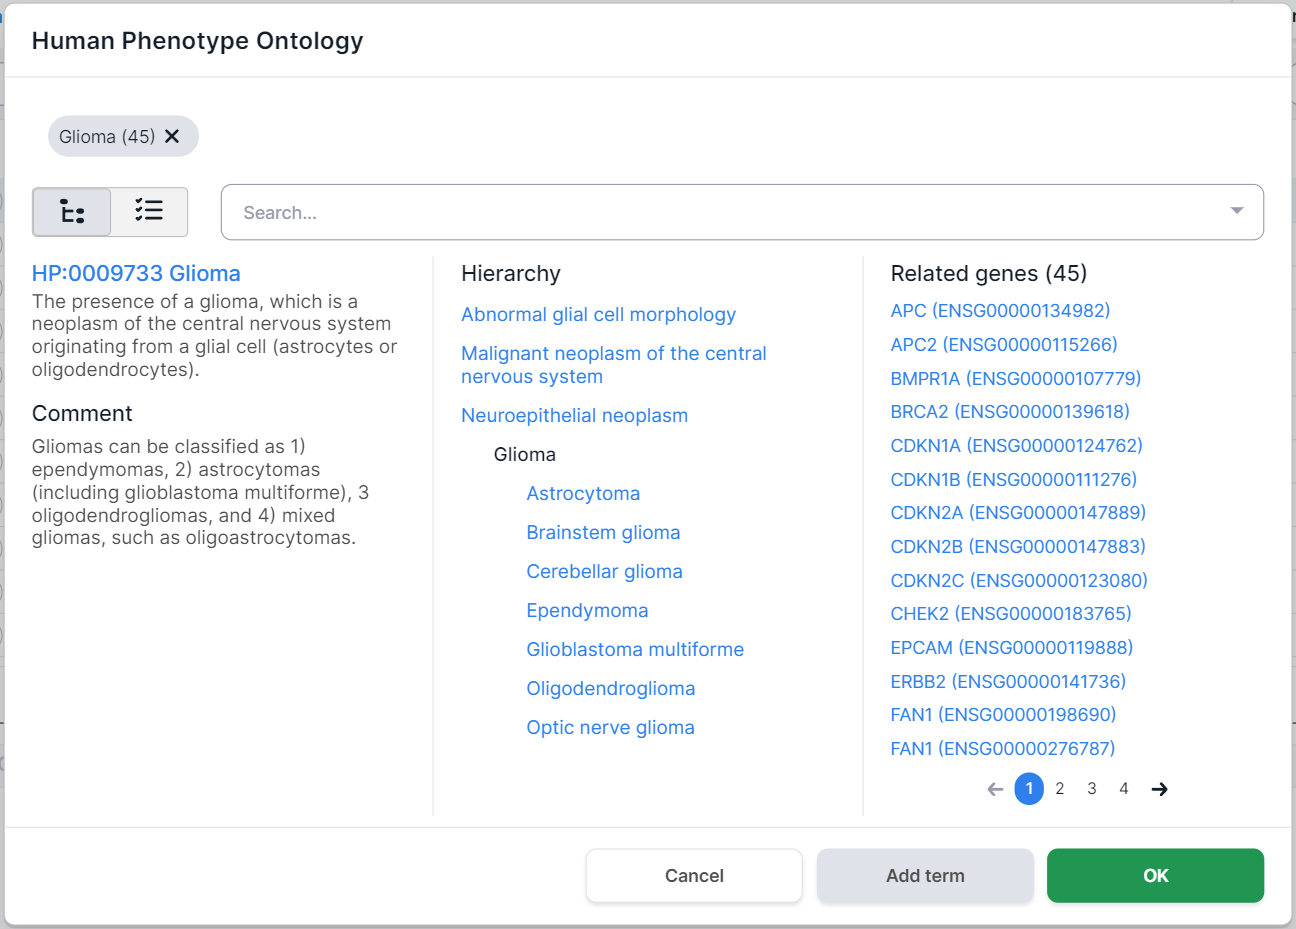
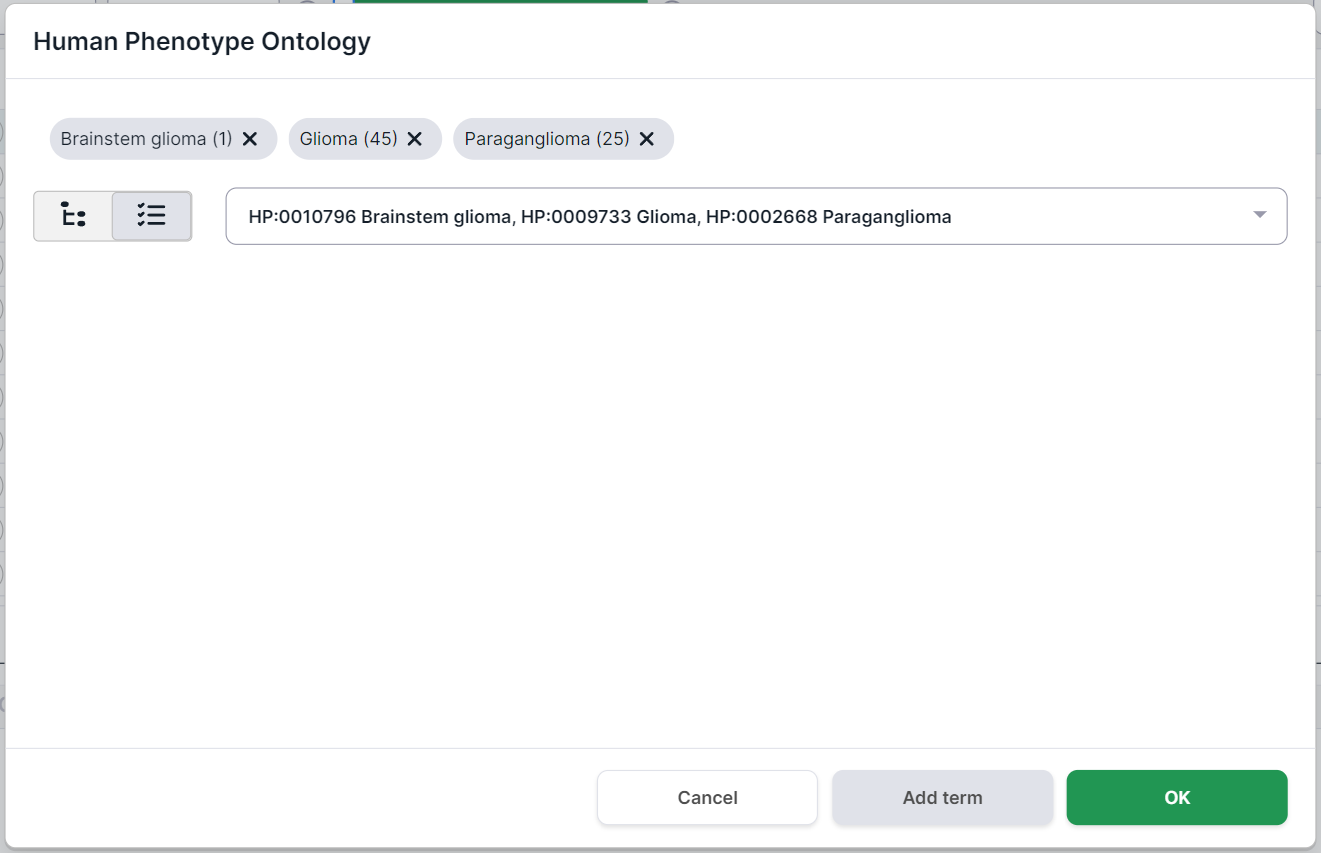
The phenotypes selected for filtering are marked above the disease card. Number in parentheses
indicates the number of genes associated with the phenotype. By clicking on a term, you will see
the phenotype card. You can remove the term by clicking on
the cross ![]() :
:

On the left side of the phenotype card, there are its definition and comments. In the middle, there is the hierarchy of the disease: the terms above the selected Glioma disease are its ancestor phenotypes (i.e. the phenotype groups that include Glioma), and the terms below Glioma are its child phenotypes (i.e. the diseases that are part of the Glioma group). On the right, there are the genes associated with this disease (in this case, 45 genes were found).
Search for a term by hierarchy in the phenotype card. By clicking on the name of the ancestor or child phenotype, you will see this phenotype page. If the phenotype has not yet been selected for filtering and genes associated with it have been found, then you can select it for filtering variants by clicking on
 .
.Search for a term in multiselect mode. Switch the search mode by clicking on
 . You will see a list of main
groups of phenotypes with checkboxes. You can find a phenotype by searching for the name or ID from HPO.
For example, when searching for the disease “glioma”, several terms are found:
. You will see a list of main
groups of phenotypes with checkboxes. You can find a phenotype by searching for the name or ID from HPO.
For example, when searching for the disease “glioma”, several terms are found:
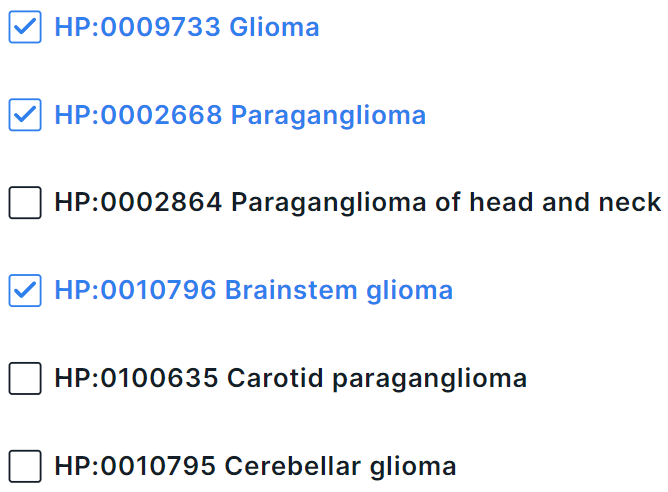
In multiselect mode, you can select several terms at once in the drop-down list. To select a term to filter, click on its line:
To complete adding terms for filtering, click outside the drop-down box within the phenotype search form.
At the top of the form, you will see the phenotypes selected for filtering. Number in parentheses
indicates the number of genes associated with the phenotype. By clicking on a term, you will see
the phenotype card. You can remove the term by clicking on
the cross ![]() .
.
To filter variants by genes associated with the selected phenotypes,
click on  .
You can see the selected phenotypes in the tooltip by hovering over the HPO filter field:
.
You can see the selected phenotypes in the tooltip by hovering over the HPO filter field:

To cancel filtering by all phenotypes, hover over the filter window and click on the cross:

or click on the field and edit your selection in the phenotype search form.
5. Min depth level#
- Filtering by sequencing depth. You can vary the level using both the plus/minus and the slider. Between 1x and 50x the filter step (scale) is 1, between 50x and 100x is 3, and between 100x and 300x is 7.

6. Saved queries#
Filtering by saved queries is available in two modes:
- Single query. When a single query is selected, all conditions included in that query are displayed above the table after applying the filter.
- Multiple queries. When multiple queries are selected, filtering is performed as a logical OR combination of the queries. In this case, only the names of the selected queries are shown above the table, while their conditions can be viewed in the query builder.
Saving queries is described in the corresponding section.
Reset Filtering#
To clear all filters, click on ![]() .
.
To reset a separate filter:
- Click on the filter window and then on
 .
. - If the filter allows to select several options at once (for example, filter by Gene), then you can remove one of the selected filter options. To do this, click on the filter window and uncheck the option.
- To change the selection of HPO phenotypes by which variants are filtered, click on the HPO filter field and edit your selection in the phenotype search form. To reset filtering for all selected phenotypes, hover over the filter window and click on the cross: